The Best Places to Stash Small Kitchen Appliances

There are the big 3 appliances — the fridge, range and dishwasher — which most of us know and which are must-haves for each kitchen. However, through the years, little, single-purpose appliances also have proliferated. Toasters, mixers, blenders, food processors, bread manufacturers, waffle makers, coffee machines and so a lot more gadgets have become a part of our kitchens.

However, where do we keep these appliances when they’re not being used? How do we keep them close at hand with no taking up precious counter space?

Darren James Interiors

An appliance garage. Utilize a smaller part of a tall cupboard if you don’t have a large cupboard or pantry space for all these appliances. Add cupboard doors which may move entirely out of the way, and place the appliances on a rollout shelf for easiest accessibility.

Sawhill Kitchens

With an outlet or two at the back wall, the appliances will be ready to use when needed and hidden from sight when not.

ROM architecture studio

Purpose-built closets. You can also dedicate a cupboard for a particular small appliance. Among the most typical uses it to shop mixers. Possessing the mixer on a pullout or lift-up shelf keeps the appliance useful and easily stored away. This is a really useful bit of cabinetry for an appliance used frequently.

Hulburd Design

Don’t forget to use every inch of space. It is rather simple to produce some unique and advanced small places with all the different kinds of cabinetry hardware accessible.

Bunker Workshop

A little appliance closet. A closet-like space may be a fantastic home to all your little appliances. Equipping the cupboard with strong rollout shelves may make obtaining at them simple. When you are finished blending, mixing or toasting, just return the appliance to its home and close the door.

Bud Dietrich, AIA

The most omnipresent little appliance needs to be the coffeemaker. More frequently than not, this superb little machine is placed in which it takes up precious counter space. Rather than let it get in the way, try placing it in a dedicated cabinet, away from the main work area. This manner that individual who desires another cup of morning joe remains out of the cook’s way.

The Woodshop of Avon

If a committed cabinet is not in the cards, then try placing the coffeemaker at a committed corner constructed into the corner.

Marie Newton

A shelf in the pantry. Putting these appliances at a dedicated space in a cabinet will work, particularly if the cabinet is well thought out and organized. A pair of pocket doors supplies ample access and turns the cabinet to what it must be: an expansion of the kitchen.

Chelsea Atelier Architect, PC

If budget permits, a built-in coffeemaker using a slide-out counter can’t be overcome.

Kitchen Thyme Design Studio Inc..

A corner counter. If your kitchen has the space for this, a committed work area will make using that coffee maker, mixer or panini press even more enjoyable — and make room for more than 1 cook in the kitchen.

See related

Beadboard Panels Give a Shortcut to a Classic Style

Beadboard wainscoting has a classic look that never goes out of fashion. Conventional tongue and groove beadboard may be significant chore to put in, but you can get a similar appearance with beaded hardboard boards, and the practice is comparatively straightforward.

Beaded hardboard paneling is an engineered wood product, generally made from MDF (medium density fiberboard) or a ecofriendly hardboard, also comes in a number of finishes. My loved ones and I gave these panels a shot in our little bathroom for a classic decorative finish that will safeguard our bathroom walls from tear and wear.

Meg Padgett

We chose Georgia-Pacific’s True Bead ready-to-paint 4-by-8 foot panels. You can also find beadboard kits which include paneling, baseboard and chair rail trim, but we created a custom beadboard/board and batten treatment with Engineered timber, MDF and casing.

Note: Feel free to replace any all-wood material for MDF. Wood generally holds up better in a damp environment like a bathroom, although we’ve never noticed any issues with our MDF.

Meg Padgett

Tools and Stuff:

Beadboard MDF paneling (comes in 8-foot-wide sheets)
Grade and measuring tape
Chalk line
Construction adhesive (such as Liquid Nails)
11/2-inch finishing nails or brad nails
Hammer or finishing nail gun
Nail set
Jigsaw
Handsaw, table saw or circular saw
Miter saw or miter box/hand saw
1- by 6-inch primed whitewood
11/16-inch by 31/2-inch MDF (used for backer board)
1- by 2-inch primed whitewood
9/16- by two 1/2-inch MDF (used for battens)
3-inch decorative fiberboard casing
Paintable caulk (such as Dap 3.0) and a caulking gun
Semigloss interior paint

Meg Padgett

Ready the room for setup by carefully removing all baseboard trim so that it can be reused. Eliminate all socket and switch hardware and covers from the walls. Eliminate the toilet if needed. Leave any window trim.

If you would like to upgrade the wall paint, do this prior to setup. Paint the wall down into a couple inches lower than the beadboard’s finished height.

When choosing your panels, pay proper attention to the status of each panel and read the manufacturer’s directions on the back of the panel for proper setup.

Note: Like all wood products, fluctuations in temperature and humidity may lead to hardboard paneling to contract and expand slightly. Before installation, stand the panels long borders in the area for at least 48 hours in order that they can adapt to the existing room conditions.

Meg Padgett

Measure from the floor to a desired height (beadboard is usually installed 33 to 48 inches ) and add
⅛ inch to the height to allow for thermal growth. Mark your height and use a level and pencil or a chalk line to mark a line.

Meg Padgett

Cut your panels to height using a handsaw, table saw or circular saw. Cut the panels up if using a handsaw and confront if using power tools. Make a detailed guide for any cutouts, allowing for a 3/16-inch gap around window trim and a 1/16-inch gap when linking bits. Use a jigsaw to cut holes for sockets or detailed cuts, such as around windows. Be sure to follow the spacing pattern of the beads in the beadboard paneling when joining two pieces together.

Dry fit the paneling into the wall first and make any alterations necessary. Subsequently apply construction adhesive to the back of the plank about 1 inch around the outside edge and in a squiggly line layout in the middle. Put the panel in place and use shims to be sure the panel is level.

Hint: For cuts around sockets, draw around the socket with chalk or pencil. Place the back side of the panel against the wall and contrary to the socket. The chalk outline will move to the back of the panel, which makes you a guide on your cutout.

Meg Padgett

Firmly press on the paneling against the wall. While the glue is drying, fasten the paneling in place with a couple nails. I prefer using a finishing nail gun for fast and easy nailing. If you’re using a hammer, drill pilot holes for the finishing nails with a 1/16-inch drill bit first, to prevent damaging the board.

Meg Padgett

Once the paneling is in place, complete it with trim. Attach the 51/2-inch baseboard. Use a level and shims to make sure the board is level. Utilize a nailing gun or hammer and nails to secure the baseboard into position.

Meg Padgett

Next attach the backer board to the top of the beadboard, once more making sure the board is level. For corners use a miter saw or miter box to reduce 45-degree angles on the ends that match in the corner. You might also use the miter saw or box for a more finished look on the ends.

Meg Padgett

Install the vertical battens. The spacing of the battens is up to personal preference, but we placed ours roughly 13 inches apart.

Hint: It’s more important to make certain the battens run parallel with the beads in the beadboard than they are plumb. If you’re lucky and your walls are level and straight, you should be able to attain both.

Meg Padgett

Nail the casing into the backer board, making sure the shell is flush with the surface of the backer. As opposed to nailing into the cap of the MDF trim, which may lead to dividing, apply construction adhesive to fasten the remaining piece into position.

Meg Padgett

Together with the beadboard and trim in place, the wall treatment is ready for any finishing touches.

Meg Padgett

Apply white paintable sealant to any nail holes, gaps or places where trim meets trim. After the sealant has dried, paint with easy-to-clean semigloss paint.

Meg Padgett

This upgraded take on the classic beadboard wall treatment has been the perfect upgrade to give our little cabin bathroom some character that fits our house’s style.

See related

Pedestal Tubs Have Style Bases Covered

Claw-foot tubs, those freestanding beauties that encircle on four legs that were cosmetic, have enjoyed a resurgence due to charm and their shapely curves. But among their drawbacks is the fact that cleaning the floor area beneath them can be a headache (or, more correctly, a backache).

To get a similar look with simpler maintenance, go to get a pedestal bathtub instead. These versions have the generous soaking area and graceful traces of the claw-foot cousins, but they rest on a good foundation rather than feet. They seem more updated and swallow less space than the whirlpool models that were the rage in the ’90s, plus they add a touch of spa-like luxury into the easiest of baths.

Read the baths below, then make a comment and tell us which bathtubs hit your fancy.

Zieba Builders, Inc..

A timeless pedestal bathtub, tucked into a window alcove that overlooks a beautiful view of the outside, softens the angular lines of this serene bath. A chandelier over underscores the sense of a luxurious retreat.

Tip: Depending on where you set your bathtub, you may need specialty fixtures which can drive up the pipes bill, such as a floor-mounted or rim-mounted faucet and proper drain and overflow mechanisms. Prior to purchasing, consult with a certified plumber about your choices and what their installment will demand.

If you want to use the bathtub as a shower base, you’re going to need a separate shower enclosure and faucet, which will add yet another layer of costs and complications.

Renewal Design-Build

They can be a wise option for bathrooms because tubs appear to float inside their surroundings. Not only do they take up less visual space, but their smaller footprint exposes more floors.

Beckwith Interiors

Among the best features of pedestal bathtubs is their versatility. If you have the space, and whether the water source could be configured accordingly, you could position one at any place in the bathroom that fits your requirements. In addition they come in these diverse lengths and widths which you don’t have to worry about conforming to a predetermined niche.

Tip: Pedestal tubs are normally expensive compared to conventional styles — expect to pay approximately $1,000 to $2,000 to get a simple model from a home center. Custom surfaces or expensive materials, such as the walnut to the bathtub can propel the price tag as large as five figures.

Looking for bargains? Try salvage stores Craigslist, flea markets and auction sites.

Courtney Blanton Interiors

This tub slips neatly in an odd piece of space between 2 vanities and produces a point that is compelling. The eye is led by the pattern of the veined marble flooring directly.

Is marble right for you? Find out more

Friehauf Architects Inc..

Although people picture bathtubs in their oval form, this style has been redefined by fresh profiles. This version rests on a base that is slender and has.

Tip: For young children or for those with restricted mobility, getting in and out of a freestanding bathtub can be difficult. Maintain a slip-proof stool .

Andrea Schumacher Interiors

One downside of freestanding tubs is they surround for storing accessories or lack a ledge. The solution? Add a table nearby and bring in baskets for towels, a rack for robes and other areas to corral sundries.

Stonewood, LLC

Another strategy: Place the bathtub next to a wall of built-ins that keep tub gear. Since the cabinetry will not, in this setting, the bathtub feels.

Wendy Black Rodgers Interiors

Much like claw-foot and other freestanding tubs, the outside provides an opportunity to add a shot of a different end or colour to the toilet. This turquoise variation, together with green walls, brightens a area.

Tip: Painting or reglazing the outside of a bathtub is a catchy, time-consuming and potentially hazardous process, involving strong chemicals and/or laborious sanding of the old end. Should you lack DIY experience and sufficient security features such as ample ventilation, have an expert deal with the job.

Jane Kim Design

A chrome-plated slipper design, with a studded band around the floor, lends a sleek, edgy notice to an industrial area.

Watch more of this New York attic

Gibson Gimpel Interior Design

This nickel and aluminum bathtub emits a feeling of rustic warmth and harks back into the mobile tin washtubs of pioneer times.

Tip: Although cast iron and other metal bathtubs retain heat exceptionally well, they are also quite heavy. Have your flooring to find out whether it can bear the weight is assessed by a professional. Fiberglass and resin versions are lighter alternatives.

See related

Stay Cool About Selecting the Right Refrigerator

Few of us think about refrigerators, much less obsess about these, until we are faced with dropping $2,000 to $10,000 on one. And what a range in price for a home appliance that’s supposed to do one basic thing: keep your food cold. What accounts for the price differences? Stick around while we discuss the principal types of refrigerator designs to describe.

Southern Studio Interior Design

1. Counter-Depth Refrigerators

What it is: Counter thickness means the body of the unit is as heavy as the countertop but the doors extend past that due to the hinges. Counter-depth units are generally 32 to 36 inches wide, 24 to 26 inches deep (not including the doorway) and 68 to 71 inches tall. If you’re looking for a true built-in, a counter-depth refrigerator won’t cut it, but the price tag might: It’s often tens of thousands of dollars less than an authentic built-in refrigerator.

Variations: This fashion refrigerator comes in many forms. French doors are very popular today, and since the side-by-side doors are half as wide as one door, they’re fantastic for kitchens with tight clearances. Side-by-side and regular old bottom-freezer options also can be found. Like all the refrigerator types in this ideabook, they’re offered in a selection of finishes besides stainless steel.

When to use: This is a fantastic choice if you’re looking for something that looks sleek and more built in than a standard-depth refrigerator, that includes more clearance around the doorway and costs less than an authentic built-in refrigerator.

Rebekah Zaveloff | KitchenLab

Side-by-side counter-depth alternative. This counter-depth refrigerator is a 36-inch side-by-side. As you can see, the doors stand out past the side panels and cabinets to allow the doors to fully swing open.

Rebekah Zaveloff | KitchenLab

All-refrigerator or even all-freezer counter-depth alternative. This style of refrigerator or freezer provides you a ton of cubic storage without the price tag of high-end commercial-style ones, but of course, you want more room to have two in precisely the same location. Customizing your cabinets and panels can make these components look like custom built-ins for a modest extra cost.

AJ Madison

Electrolux IQ-Touch Series Counter-Depth French-Door Refrigerator

This really is a side-by-side refrigerator using a base freezer and French doors.

Contemporary Refrigerators – $2,199

There are numerous options for side-by-side versions with glossy water and ice dispensers and door handles.

AJ Madison

Fridgidaire Professional Series All Refrigerator – $1,543

A custom trim kit panel causes this 32-inch freestanding counter-depth unit look like one huge business refrigerator/freezer.

2. Full-Depth, or Standard, Refrigerator

What it is:
A standard-depth refrigerator is roughly 68 to 71 inches tall and 31 to 35 inches deep into the surface of the doors.

Variations: These come in side-by-side, bottom-freezer and top-freezer options and stainless steel, black or white finishes.

When to use: When clearance is not a concern and you’re looking for the most amount of cubic storage with the smallest amount of width and height, the thickness is where you purchase it. This also is the most affordable option. For people used to a full-depth refrigerator, the interior storage using a counter-depth or built-in refrigerator may be a jolt. It’s a fantastic idea to compare cubic footage before you buy.

AJ Madison

Whirlpool Gold GSS30C6EY Side-by-Side Refrigerator – $1,704.60

From the front it is difficult to tell a standard-depth from a counter-depth refrigerator. The first clue will be the price tag: Counter-depth ones tend to cost more. Secondly, check the specs: A normal refrigerator can be 6 inches deeper. If you are looking at this alternative, consider your circulation path; a standard-depth refrigerator can really alter the flow and layout of a kitchen.

Tip: By creating the cabinets a customized thickness around the refrigerator, you can find the look of a custom built-in refrigerator without the hefty price tag.

Fivecat Studio | Architecture

3. Bottom-Freezer Built-In Refrigerator

What it is: Built-in units are generally 80 to 84 inches tall and 24 to 25 inches deep into the surface of the doorway. The entire unit, including the doorway, is flush with the thickness of the majority of standard cabinets. Bottom-freezer units can also be known as over/under refrigerators; they often come in 27-, 30- or 36-inch widths.

Variations:You can get most bottom-freezer built-ins in both stainless steel and panel-ready options, as well as glass fronts.

When to use: All these are fantastic for smaller kitchens due to the width. If you have a bigger kitchen, you can use two of these side by side. The best place for this kind of refrigerator is at the end of a cupboard run in which the door swings open into the work triangle. You can specify the single-door components to have a ideal hinge or a left hinge.

AJ Madison

Sub-Zero BI30U Built-In Bottom-Freezer Refrigerator

The traditional single-door bottom-freezer built-in model is still among my favorites. I like the produce I use every day to be up high and the suspended goods down below from the drawer.

1 2 S T U D I O . C O M

4. Built-In Side-by-Side Refrigerator

What it’s: A side-by-side unit gets the refrigerator on the right and the freezer on the left, using the breaker on top.

Variations: They come with and without water in the doorway and are generally 24 to 25 inches deep into the doorway; 36, 42 or 48 inches wide; and 84 inches tall. Most have a freezer that’s smaller than the refrigerator.They’re also available in stainless steel or panel-ready options, as well as some glass door options.

When to use: These are perfect for kitchens in which you have ample room for one big unit on another wall. They generally work well on the side of a wall of cupboards or perpendicular to the job triangle, as a result of fridge’s being around the right.

People frequently get “built-in” and “incorporated” confused. The principal distinction is a built-in may be flush into the cupboards and look glossy as can be, but it will not be completely concealed. The flange along the exterior of the unit and the grille on top will give it away as a refrigerator, even though it’s a matching cupboard panel.

Mrs. G TV & Appliances

Sub-Zero BI-42S Side-by-Side Refrigerator/Freezer

If you’d like a side-by-side, I suggest you opt for at least 42 inches of width — if you have room for 48 inches, even better. The 36-inch side-by-sides don’t have lots of cubic storage in the refrigerator section.

Rebekah Zaveloff | KitchenLab

Between the water and ice on the door and the C-channel pulls, this panel-front built-in side-by-side isn’t attempting to hide its identity. The chalkboard panels are a nice alternative to stainless steel, alleviating fingerprint worries for the busy household who uses it.

US Appliance

GE Profile Built-In Side-by-Side Refrigerator – $5,699

Here’s the same refrigerator with wood panels instead of a chalkboard finish. With the flange along the outside border and the water and ice in the door, it is not considered completely incorporated. (See next for one of these.)

Rebekah Zaveloff | KitchenLab

5. Fully Integrated Refrigerator and Freezer Column Units

What it is: Fully integrated grills can be completely concealed with cabinet-panel fronts. The hinge style, the absence of an exposed frame and a design that allows the door to conceal the compressor create this possible.Whereas all-refrigerator and all-freezer components have been around for a while in pubs, entirely integrated column-style components are relatively new on the residential industry. They allow for more flexibility since they can be placed together as a custom side-by-side mix or kept independent.

Variations:
Although these units ideally have cupboard panels to conceal them completely, they also come in stainless steel. Typical widths are 18, 24, 30 and 36 inches; peaks range from 80 to 84 inches. They’re 24 to 25 inches deep.

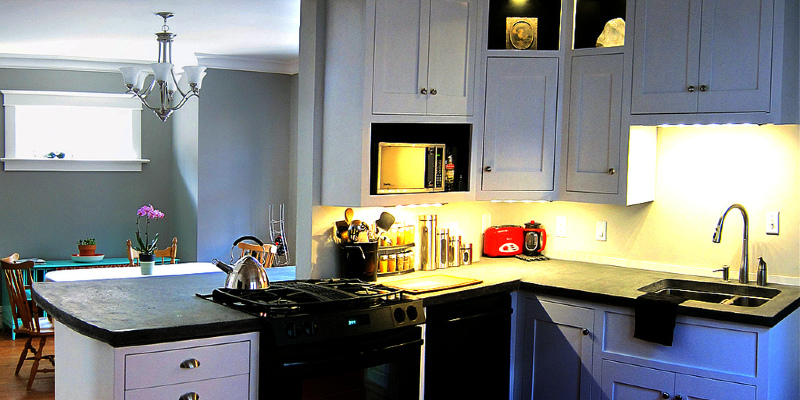
When to use:
Choose this style if you’re interested in the ultimate customization and flexibility, if you want to break up the place of your refrigerator or freezer, or if you want to produce your refrigerator completely vanish. In this kitchen, the 30-inch refrigerator is the white panel doorway to the best of their ovens, and the 24-inch freezer is the oak-paneled doorway in the foreground concealed within the pantry cabinetry.

US Appliance

Thermador 30-Inch Freedom Fresh Food Column

Column-style units can be stainless steel or board ready for complete concealment.

Design Moe Toilet & Kitchen / Heather Moe designer

Some of the completely integrated components have drawers as well. One more advantage of this style of refrigeration is that you can make furniture-style cabinetry.

AJ Madison

Sub-Zero 736TCI 36-Inch Built-In Bottom-Freezer Refrigerator

What’s nice about the Sub-Zero 700 series is that you can find an all-refrigerator, all-freezer or combo unit in which the freezer is in the base drawers.

What kind of refrigerator works best for you?

See related

See The Way Wood Warms Modern White Kitchens

I adore an all-white kitchen tiles, counters, cabinets. It is bright and clean and open. However, it may also be a bit sterile. My mother calls for these kitchens morgues. In other words, they can feel cold.

That is kind of the opposite of the way the core of the home is supposed to feel. Right?

However, you don’t have to forfeit your white kitchen along with your modern dreams. All you have to do is add a small natural wood grain to the mixture. And poof! — warmth that is instant.

These 11 kitchens are ideal examples of how you can maintain your modern lines and clean, open atmosphere while incorporating a modest natural glow.

Andrew Snow Photography

Red-Toned Wood

Mix it up. All cabinets do not have to be the same. 1 bank can be white; another bank can be wood grain. There’s nothing cold about this bright kitchen.

Tervola Designs

A wooden countertop on the island is a popular way to bring some natural grain to the mixture. As for me, I don’t adore wood next to water sources (stains, mould and warping), but I do love a big slab of shining wood in the midst of a kitchen.

Elad Gonen

Golden Wood

Wood with a very conspicuous grain is the modernist’s way to go. It is still hot, but it’s got those nice, almost symmetrical lines.

Works Photography Inc..

This wood peninsula has both hot golden tones and stylish horizontal lines.

Buckenmeyer Architecture

In this kitchen, the kitchen cabinets all match, but the countertops are blended.

Devlin McNally Construction

Sometimes just a lovely wood floor provides just the ideal warmth. It is that little milk of human kindness every kitchen needs.

Cardel Homes

Brown Wood

Dark wood tends to be more traditional (although not necessarily). This wood island keeps all that white tile out of making the kitchen seem like a laboratory.

Ilija Mirceski

Dark wood goes modern with horizontal lines. I adore the wood-backed shelves — unexpected and rich looking.

WORKSTEAD

Nothing brings an organic touch just like a gorgeous bit of live-edge wood. This one appears to be melting off the staircase. Gorgeous.

Watch more of the house

Abbott Moon

A wood-grain table in an Granite kitchen gives this particular setup a homey feel. The wooden beams, cupboard design and wood floors all add up to a very comfy kitchen.

Siemasko + Verbridge

This kitchen isn’t even close to feeling like a morgue; the tooled legs on the staircase, cottage-style windows and recessed-panel cabinets take care of that. Nevertheless, the dark wood floors and the rugs rugs make it really warm. I really like Persian rugs at a wood and white kitchen.

More:
The situation for wood countertops
Browse white kitchen photos

See related

Fantastic Lakes Gardener's September Checklist

It is finally September, and also the ideal weather of the season is available for Great Lakes gardeners. With the humidity dropping and the temperature moderating, we have got the ideal environment for outdoor pursuits. Summer garden visitors have started to drift southward in their autumn migration, and many of us are finally feeling like handling those lawn chores we put off during the heat of summer. September is also a excellent time for wildlife viewing — monarch butterflies and hummingbirds may be making pit stops in your backyard. And the landscape is reviving with repeat blooms and the vanguard of fall bloomers. Let’s dig.

Barbara Pintozzi

Feed the birds. Tricyrtis and also our indigenous honeysuckle (Lonicera sempervirens) attract migrating hummingbirds.

After taking the time to enjoy backyard visitors, it is on to getting stuff done in the backyard.

Barbara Pintozzi

Collect leaves. The leaves may begin falling earlier this season because of the drought. Do not offer those leaves off — up them, put them in a pile and make leaf mold. It is a great soil conditioner and the best dressing for woodland plants.

Revive yards. If your yard sports dead spots courtesy of this drought, September is the best time to rejuvenate it by sowing grass seed. From November the yard ought to be lush and green again.

Plant perennials. September is also the ideal time to plant perennials and woody plants. It used to be that spring was the ideal time to plant in Great Lakes gardens, but anglers are finding that using unreliable moisture and often unbearable summer heat, fresh plants do better under the less harsh conditions of fall. By planting in September, the gardener has been guaranteed that the new plants will have enough time to become established before winter.

Barbara Pintozzi

Replace container gardens. It is time to refresh tired, exhausted containers. Here, Petunia ‘Phantom’ blossoms that have a little sedum, ‘Razzleberry’ and a little zinnia. Pansies and pumpkins are also great replacements for exhausted summer annuals.

View 8 knockout blossoms for a fall container garden

Barbara Pintozzi

While cosmetic cabbage is a fall standard, edible cabbage is equally attractive.

Barbara Pintozzi

Enjoy September blossoms. Here come the autumn-blooming plants. With the warmer temperatures, many perennials that played through the heat of summer will enjoy a fresh crop of blossoms in September. Dianthus ‘Cranberry Ice’ faithfully reblooms with its neighbor here, a lavender (Lavandula angustifolia).

Barbara Pintozzi

Roses, such as ‘Carefree Beauty’, and dahlias bring forth ideal blooms after the demise of Japanese beetles for the year.

Barbara Pintozzi

Caryopteris incana ‘Jason’ (Sunshine Blue) is a parasitic magnet in September. Caryopteris x clandonensis ‘Janice’ (Little Miss Sunshine) is similar yet more compact. While Caryopteris is categorized as a die-back tree in zone 5, lots of fantastic Lakes gardeners discover it survives the winter just fine with adequate snow cover. Even if it expires after a winter, from the subsequent September it’ll return and filled with blossoms.

Barbara Pintozzi

When the garden most needs a snapshot of freshness and colour, the asters (Symphyotrichum novae-angliae ‘Honeysong Pink’ and S. laeve ‘Bluebird’) are unfurling their own daisy-like blossoms in vibrant colours. By placing New England asters behind plants that are shorter, you can conceal their nasty legs.

Barbara Pintozzi

Asters aren’t the only indigenous prairie plants to shine in September. All the prairie grasses — including as Indian bud (Sorgastrum nutans), found growing here with Maximilian sunflower (Helianthus maximiliani) — turn vibrant colours.

Barbara Pintozzi

In a September shade garden, Japanese anemones (here Anemone ‘Andrea Atkinson’) are queen, reaching 5 feet at a year with great moisture.

Barbara Pintozzi

Few things beat the strong, sweet scent of this fall-blooming Cimicifugas (Actea simplex ‘Black Negligee’). A fantastic stand of them perfumes the whole backyard.

Get out in the backyard while the weather’s great. Most of us know it is not likely to last.

See related

8 Ideas to Transform Your Basement Into a Wine Cellar

Many people (myself included) keep wine bottles stacked on the counter or a couple of whites chilling in the fridge. A real wine enthusiast balks at this idea — wine requires appropriate storage, and a regular kitchen cupboard does not quite cut it. If you have been contemplating building a suitable house for your own wine collection, consider having a peek at your cellar — it is probably the right spot for a wine cellar. Here, interior designer Mark Cravotta of all Cravotta Studios shares tips on creating the right space for your vino.

Vin de Garde Cellar Systems Inc..

1. Control the climate. If you have the budget for this, Cravotta suggests investing in a wine room–specific HVAC system. “They keep consistent and suitable balance between humidity and temperature in a way traditional systems can’t,” he states.

jessop architects

2. Insulate properly. If an HVAC system does not fit your financial plan, make sure the temperature is correctly controlled through insulation. This has a great deal to do with your geographic location, so consult with a professional to evaluate your situation. If you’re in the southern United States, as an example, Cravotta implies treating the shell by making a moisture barrier to the outside of every wall plus the floor and the ceiling, as well as adding closed-cell foam insulation to prevent condensation buildup and mold.

NF insides

3. Make use of the space you have. You do not require an whole room for your own wine cellar. If you’re tight on cellar space, look at repurposing a cupboard or a small storage area.

4. Choose stainless steel for a modern look. “preventing airborne contamination is definitely important,” states Cravotta. “The wine racks should be a substance that will not off-gas.” Stainless steel is a quality choice that provides wine cellars a modern aesthetic.

Design Build Consultants Inc..

5. Pick wood with a natural finish for a traditional look. Cravotta recommends choosing a wood that requires only a mineral oil finish, such as mahogany, walnut or cypress.

Yaniv Schwartz – Photographer

6. Utilize zero-VOC paints. In case you choose to paint the wine racks or other surfaces in the basement, be sure they are treated using zero-VOC paints and finishes to prevent corrupting the wine.

New Mood Design LLC

7. Pay attention. Cravotta suggests using Cree LEDLRP-38 bulbs on conventional line-voltage tracks. “They’re economical, dimmable using standard dimmers, and also the quality of lighting is very much like the very best halogen offers,” he states.

8. Think about a tracking system. “For larger collections, you might want to consider a systematic means to mark the racks with a few of the many available wine room management software applications available now,” states Cravotta. “We are currently working a wine cellar where we’re utilizing French enameled alphanumeric tags that will be attached at every jar place. They’re as beautiful as they are functional.”

See related

Weeds the Way

The past warm weeks of summer and the first days of autumn are perfect times to get a jump start on pest and weed management for next spring’s blossoms. Smothering and solarization are two ways you can use to prepare backyard spaces — both large and small — if time is not a variable. Both methods use simple, cheap and chemical-free methods that result in healthy and nutrient-rich soil for planting.

Jocelyn H. Chilvers

Smothering is an exaggerated form of mulching. A thick coating of paper or cardboard, topped by several inches of organic matter, deprives existing weedy plants of light, thus inhibiting their development. By utilizing organic substances that decompose quickly, you also get the benefit of composting. Plant directly to the darkened area once the current weeds are conquered.

How to smother weeds:
Mow or chop the existing vegetation from the area selected for future planting.Spread a layer of paper (exclude coloured pages), newsprint or brown kraft paper (eight to 12 sheets thick), or three to four layers of cardboard. Be sure to overlap paper edges so there are no gaps.Saturate with water.Cover the whole paper area using a 4-inch-layer of natural material — Engineered wood fiber, wood chips, pine needles, cocoa hulls, etc.. Alternatively, an 8-inch-layer of lighter stuff, such as dried leaves, grass clippings, or weed-free straw, may be used.Let the area remaining autumn and winter.This technique functions for regions both large and small, at the sun or in the shade. It’s not a cure for noxious, perennial weeds that have aggressive root systems, but it is fairly prosperous means to get rid of yearly and biennial weeds as well as several grasses.

research.pomona.edu

Solarization uses radiation from the sun plus moisture to warm soil to 99 to 125 degrees Fahrenheit. This treatment not only kills weeds and weed seeds, but in addition soilborne pathogens such as fungi, parasitic nematodes, insects and a few bacteria. Soil solarization also speeds up the breakdown of organic matter in the soil, resulting in more available nitrogen, calcium, magnesium and potassium. It’s a easy, chemical-free way to revitalize an older planting bed or prepare a new one.

How to solarize weeds:
Rototill or spade existing plant material and extra organic matter (chicken manure, grass clippings, etc.) to the soil. Decomposing organic matter contributes additional heat to the process and can also protect soil microbes. Rake the soil smooth and lump free — the aim is a clean, horizontal surface.Wet the soil to a depth of 12 inches (the moisture is crucial to conduct heat through the soil). Keep the soil moist throughout the solarization period.

Jocelyn H. Chilvers

Cover the soil surface with clear (preferably UV-stabilized) vinyl, 1.5 to 3 millimeters thick. The plastic has to be held closely against the ground surface; secure the edges by burying them to 6 inches into the ground. Note: Thinner plastic is less costly and may be utilised in a double coating, but is more prone to animal or wind damage. In cooler climates, using black vinyl for a longer period of time may be as effective as clear plastic.

Four to six weeks of solarization during the long, hot days of summer are enough to kill most weed seeds and soil pests. In the cooler days of autumn and spring, six to eight weeks may be critical.

Jean Marsh Design

Solarization is particularly effective for controlling annual weeds and pests in gardens with loads of sunlight and available moisture. It can be utilised in raised gardens as well as regions slated for new yards. More detailed research information and technical information on solarization can be found here and also here.

More:
5 Ways to Naturally Win the Weed War
5 Weed-Smothering Ground Covers

See related

How to Begin a Cool-Season Vegetable Garden

In late summer, you may believe your vegetable garden is on its way outside. But if you live in a mild-winter climate, then the cool-season garden may actually span the second half of the gardening season, producing fresh veggies even in winter.

A cool-season vegetable garden is full of plants that prefer the warmer temperatures and soils of both autumn and spring. Some even do their best with a bit of frost. For many individuals, cool-season veggies would be those you plant since summer winds down or early in the season, when you simply can’t wait to return to the backyard.

Wondering what vegetables you can plant in late summer and late winter for harvests in spring and autumn? There are far more options than you may think.

The Brickman Group, Ltd..

Popular crops to plant in late summer and late winter: beets, broccoli, cabbage, carrots, chard, kale, lettuces, leeks, peas, radishes and lettuce.

For the connoisseur: arugula, Brussels sprouts, cauliflower, celery, Chinese cabbage, collards, endive, fennel, onions, garlic, parsnips, salad greens and turnips.

Surprising cool-season crops: including cherry, potatoes and rhubarb. Yes, they are often thought of and grown in the summer, however they prefer the warmer temperatures of spring and autumn.

See how to increase each cool-season harvest

Natalie DeNormandie

Check for frost dates. While cool-season crops can even handle a few frost, you’ll need to focus on air and soil temperatures to get the most out of your backyard. This implies planting early enough in autumn to permit crops to reach maturity until hard frosts hit or daytime temperature drops too low (typically below about 55° Fahrenheit). In spring, you’ll need to take the reverse strategy, waiting to plant until the air and soil temperatures are warm enough for the plants to flourish.

Consider a cold stage. Cold frames and cloches allow you to set out vegetable seedlings earlier in the season and keep crops producing later in this season. They are available commercially, but it is also possible to make your own. Hinge the top of a cold frame to permit ventilation. If you wish to plant directly in the backyard, simply set the cold frame in place and remove the lid once the air temps warms up, replacing it as things cool down.

See how to extend your growing season with a cold frame

Carolina Katz + Paula Nuñez

Go green. Lettuces and other greens will go to seed and become bitter in summer, but plant them during the spring and early autumn and you can enjoy fresh-from-the-garden goodness for sandwiches and salads for weeks.

How to grow lettuce

Robin Amorello, CKD CAPS – Atmoscaper Design

Go for the cold. Some cool-season veggies can even cross the line and endure since cold-season vegetables. Kale specifically can endure until the temperature reaches the freezing point and may even survive through snow.

Robin Amorello, CKD CAPS – Atmoscaper Design

Move underground. Start rapidly maturing root crops, like carrots and beets, early in the season of course, but also plant them in the end of summer to keep them moving well into the autumn. Both may be overwhelmingly effective if you’ve got one big harvest, so only plan to keep sowing small rows or stains successively. This way you’ll always have something ready to go but will not be staring in a sea of greenery and wondering if Peter Rabbit is available for a few selective garden pruning.

Jocelyn H. Chilvers

Go for the crunch. There’s a motive broccoli is a autumn and winter favorite from the shops; it may manage the warmer temperatures. Any member of the cabbage family is a fantastic selection for the backyard when temperatures drop.

Robin Amorello, CKD CAPS – Atmoscaper Design

Move up. Tender peas have long been regarded as a harbinger of spring. Start them you may use the same supports afterwards in the summer to support beans, then get one final harvest of legumes in during the autumn.

How to start your garden from seeds

Samuel H. Williamson Associates

Give back to your garden. Fill in the empty spots in your landscape with a cover crop. Though you may end up with more fava beans than you understand what to do together, that is the idea. These crops are not grown for food; rather they are tilled or dug into the soil since alterations. There are a number of alternatives available. Legumes, as fava beans and clovers, help add nitrogen to the soil; grasses add organic matter. In this photo, clover is used to pay a hillside, but it would do the job just as well at a vegetable garden.

Next: How to Grow the Best Spring and Fall Veggies

See related

Country-Chic Dutch Family Home

Everything about this 1970s house was brown at first. “The flooring, the walls, the ceiling. That which was brown,” Manon van Niel says. When she and her husband, Ruud, purchased a tomato farm at Westland, the Netherlands, they were not sure they wanted to dwell in the outdated house that came as part of their property. But through a home improvement, Manon, a professional organizer, transformed the house to a light-filled, modern space her household is now pleased to call home.

in a Glance
Who lives here: Manon and Ruud van Niel and their two daughters, Quinty and Sterre
Location: Westland, the Netherlands
Size: 220 square meters (2,368 square feet); 3 bedrooms, 1 bathroom, studio space

Holly Marder

Space has been the priority in this renovation, so the family bumped out the dining area for additional light and space in the living area.

“In the six years we have dwelt here, my personality has changed a whole lot,” Manon says. Her country-chic style combines design aesthetics from classical to modern. To help organize her recently expanded space, Manon layered in large announcement bits against a neutral color palette.

Sofas: Kivik, Ikea

Holly Marder

A warm shade of gray, white highlights and pale walnut flooring provide a warm welcome.

Holly Marder

A set of Moroccan lanterns contrasts with a large country-style cabinet the couple purchased when they were newlyweds. Through the years, Manon gave the storage device a pretty and practical update by painting the pinewood a fresh white and incorporating shelves.

Holly Marder

The living room furniture is arranged for comfy television viewing around a potbelly stove. A true longhorn cow skull in Fort Worth, Texas, hangs above the stove. The product was brought back from among several trips the Dutch household takes to the United States.

Holly Marder

Manon picked a dramatic black because the accent color in the dining area. New, large windows open up the room, and floor-to-ceiling curtains make the ceiling look higher.

Holly Marder

“Every two years that I paint the walls, as my design keeps shifting,” Manon says. It is difficult to imagine the house with its original brown carpeting, ceilings and walls. This view from the dining room addition demonstrates where a wall separating the kitchen in the living room was knocked out.

Holly Marder

Shadows from pendant lights that Manon made from inexpensive baskets add texture to the compact kitchen.

Holly Marder

The couple’s 8-year-old daughter, Sterre, enjoys her womanly bedroom of light pink, floral lace and prints accents. Dutch firm Wood Fever constructed this custom made bed for Sterre, with built in storage drawers beneath the mattress and wardrobes on both ends. Manon painted the wood paneling white.

Bedding: Pip; Calamine, Farrow & Ball

Holly Marder

The couple’s 13-year-old daughter, Quinty, has an equally feminine bedroom that reflects her love of blue. Quinty battled cancer at a really young age, and after she completed her treatments, Manon gave her room a new look for a sign of a new start.

The vintage chandelier has been a thrift store purchase, which Manon upgraded with paint and tiny fabric-covered lampshades.

Bed: Leirvik, Ikea

Holly Marder

The family’s home office has enough room for the women to do their assignments and also for Manon and Ruud to utilize it as a workspace.

Holly Marder

The high-contrast master bedroom comprises 2 stunning photos from Cambodia taken by Manon’s cousin, a travel guide and photographer. When the couple hosted a going-away party for her, then she thanked them by allowing them to choose two of her photos to have printed on canvas.

Paint color: Oval Room Blue, Farrow & Ball; pendants: Candledrops, Zuiver

Holly Marder

An accent wall of black patterned wallpaper adds contrast and texture, and helps the wall-mounted TV to blend in the background.

Manon loathed the white antique dresser she inherited from her grandmother. A spacious walk-in cupboard is located behind the white portrait doors.

Holly Marder

To make more room in the master bathroom, the couple opened the original slanted ceiling and added a dividing wall in the center of the room, with the shower on one side and the bathroom on the other.

Straightforward Ikea cabinets function as his-and-her sink vanities, even though the few intends to replace them shortly.

Holly Marder

Holly Marder

Westland is popularly referred to as the produce and flower region of South Holland. Large potted plants line the greenhouse, in which the household grows berries. A huge studio area sits off the courtyard, between the house and the greenhouse.

Holly Marder

Manon exercises her creative power in this black and white studio, complete with a kitchenette. Here she creates things for your house, such as cushions, clothing, accessories and gifts for your girls’ rooms.

As a professional organizer with her own business, Organize Your residence, Manon also holds here.

Holly Marder

On the exterior, immaculate garden beds of lavender and mondo grass pair with tidy paving. In this image, you can see the dining room extension.

Holly Marder

The household has a swimming pool at the front yard, a rarity in the Netherlands.

Holly Marder

Here is Manon, at home in her living area. The house has come a long way since she first stepped on the property six decades ago, but now, she says,”I love it here!”

View more photographs of this van Niel home

Perhaps you have recently renovated your property? We would love to see it.

See related

Copyright h o m e s t a y b e i j i n g 2 0 0 8 2024