What Type of Mix Can You Work With in a Stihl Chain Saw?

Stihl gasoline-engine chain saws are powered by two-cycle motors that operate on a combination of gasoline and lubricating oil. The oil and gas must be blended in the appropriate proportions or motor operation will suffer. Attempting to follow fuel-mixing instructions could also lead to piston seizing and other permanent, costly engine damage.

50-to-1 Mixture

The gas-oil mix for a Stihl chain saw is 50 to1. That is equivalent to 2.5 fluid oz of low ash two-cycle engine oil per 1 gallon of mid-grade gasoline with an 89 octane rating and no more than 10 percent ethanol. When mixing, pour the oil into the container and then add the gasoline. Shake well to combine them thoroughly.

See related

How to Disinfect & Deodorize Colored Towels

Unlike conventional white towels, colored towels’ laundering labels often have finicky instructions, such as not to use bleach or hot water. This can leave you wondering how to disinfect and deodorize them. When you climb out of the bathtub or step out of the shower, a tidy, non-funky-smelling towel is really a welcome commodity. Freshen and sanitize your coloured towels at label-suggested warm or cool water, and with no harsh chemicals, to get a “funk-free” clean.

Sodium Bicarbonate, aka Baking Soda

Baking soda can clean away bad smells from nearly anythingelse. Add a half-cup or so of baking soda to a clean load of towels along with gentle laundry detergent. Always use a modest number of gentle soap to clean towels to allow them to last longer, and skip the fabric softener to get much more absorbent fibers, advises that the Towels from Gus website. Baking soda is a natural, pH-balancing material that doesn’t just cover or mask a bad smell – it neutralizes it. Whether an offensive smell remains, don’t dry the towels, but instantly repeat the washing procedure once or twice.

Lemon Fresh and Germ Free

Lemon has disinfecting qualities, but also has minor bleaching qualities, so use it carefully to clean dark- or light-colored towels. Add about a half-cup of lemon juice along with your normal laundry soap to the clean water, and allow your machine agitate or mix for a couple of seconds before adding the towels. If you have a front-loading machine, then use a bathtub to presoak your towels at pre-mixed lemon water; then squeeze out much of the water before laundering as usual. Always pretest a towel — or less expensive matching facecloth — for color fastness, and launder like-colored items together to avoid a color-bleeding calamity.

Odor & Germs, Meet Vinegar

Like lemon juice, white vinegar contains minor bleaching qualities. Use it instead of lemon juice, and along with bleach-free laundry soap. If a musty odor remains, repeat the washing procedure. If a vinegar scent is evident, then run the load via an extra clear-water rinse cycle.

Avoid the Funk

To keep towels out of creating a funky or musty smell, hang them up to dry instantly after each use. In even a couple of hours, a damp, bunched towel is the perfect breeding ground for mold spores. Wash towels frequently, but do not store damp towels in the hamper until wash day; mold thrives in damp, dark places, such as hampers. Hang them over the edge of the hamper, bathtub or shower stall to dry prior to placing them inside. Along the same lines, make sure your laundered towels are fully dry before you bend and store them away. Sometimes, add 1/4 cup of vinegar, lemon juice or color-safe bleach to the wash water to help keep your towels odor- and germ-free.

See related

How to Remove Pen From Microfiber Furniture

No matter how careful you and your family members try to be together with your microfiber sofa, accidents happen. An exploding pen or a pencil left over the sofa with the cap off may leave an ugly ink stain. The sooner you get to the stain, the better chance you have of removing it. Fortunately, microfiber furniture often has removable cushion covers, allowing greater pretreating plus a more thorough washing.

Remove the cover of the microfiber cushion if possible. Most covers have zippers that allow you to take out the foam pad inside.

Fill a small spray bottle with undiluted rubbing alcohol. Place the nozzle to the best mist.

Spray the ink stain with the alcohol and blot the stain with a white rag. Press the rag straight up and down. Do not rub, as this can null the stain.

Spray and blot as many times as required to remove the stain. If the stain is gone following the alcohol treatment, there is no requirement to use the oxygen bleach and wash. Just dry the spot with a blow dryer on low heat.

Mix a scoop of powdered oxygen bleach with sufficient warm water to make a slightly runny glue. Stir till the bleach is fully dissolved.

Apply a spoonful of bleach glue to the spot and wait for 10 minutes. Keep an eye on the cloth to ensure the paste does not dry.

Wash the cover in water in a washing machine. Insert another scoop of oxygen bleach to the washload if needed. Utilize dye-free, unscented laundry detergent.

Dry the cushion at the dryer on low heat to remove any water marks.

Replace the covers on the pillows. Brush the cushion gently with a nylon-bristled scrub brush to restore the grain and remove any remaining water marks.

See related

How to acquire a Mirror Finish on Wood

The traditional way to acquire a mirror finish on hardwood is to utilize a technique known as French polish, which basically consists of rubbing layers of shellac. This technique is time-consuming, though, and due to the stickiness of shellac, it can be tricky. A less demanding method is to rub a previously hardened finish, such as varnish or lacquer. Lacquer is a noncuring finish more akin to shellac than overcast, and because it dries quickly, it is possible to layer it more readily than varnish, which makes it a lot easier to get a glassy-smooth finish.

Sand the bare wood as needed to smooth it and remove the old finish. Complete the sanding procedure by hand-sanding with 150-grit aluminum oxide sandpaper, with the grain of this timber. Wipe off sanding dust with a dry cloth.

Fill the grain with an oil-or water-based wood grain filler. This measure is much more important if the timber is an open-grained selection, such as oak, but it makes it a lot easier to reach a mirror finish on all kinds. Use the filler having a paintbrush, scrape it flat with a plastic paint scraper, and let it dry for several hours. Sand it flat with 220-grit sandpaper, with the grain of this timber.

Spray one coat of lacquer. You may also brush or spray a coat of vanish. Wait for it to dry tack-free; lacquer takes approximately 20 minutes, whilst varnish may take one or two hours. Sand the lacquer or varnish with 320-grit sandpaper and wipe off the sanding dust.

Apply one more coat of varnish. If you’re spraying lacquer, apply two layers, sanding the first one before applying another.

Permit the varnish or lacquer to dry for one day, then level-sand with 400-grit sandpaper to remove bruises and bumps. This offers you a smooth substrate for the finish coats.

Apply one more wet coat of varnish. If you’re using lacquer, employ three additional coats, sanding each with 400-grit sandpaper prior to implement the following. Give the completes time to fully heal before rubbing them. Lacquer takes approximately a week, whilst varnish takes two weeks.

Wet-sand the surface with silicon carbide sandpaper, using water as a lubricant. Start with 400-grit paper to knock down gross imperfections, then sand the whole surface with 600-grit sandpaper. Rub until the surface shows a uniform dull sheen. Repeat the process with 800-, 1000- and 1200-grit sandpaper.

Scatter 4F pumice on the timber, spray some water or rubbing oil on it, and buff up the finish with a cotton cloth. It is a lot easier to find a full gloss finish with a power buffer than it is if you’re hand-buffing.

See related

How to Paint Brown Paneling White

Home-renovation projects do not have to break the bank when you use paint in creative manners. If you’re looking at outdated wood paneling leftover from the 1970s, you do not have to split it off the walls and begin from scratch. An inexpensive coat of paint is often all you will need to bring your decor into the 21st century. Whether you’re handling hardwood veneer at a ranch home or knotty pine at a cabin, think about painting before undertaking a full-fledged wall renovation.

Wash the walls with a damp sponge and family detergent cleaner, such as dish-washing liquid. Wring out the sponge well; clean the walls, and rub them down with plain water. Allow them to dry fully.

Prepare your work area by laying drop cloths on the floor and taping the edges of baseboards, molding and the ceiling.

Paint the walls using water-based latex primer, which prepares slick surfaces so paint will adhere. Apply one or two coats — one coat is often enough, but in case you can still see brown beneath the surface, apply another coat.

Allow the primer to dry completely between coats. If you can, allow it to dry overnight before painting.

Paint the seams of the paneling using latex paint, using a thin paintbrush. You might want to apply two coats to fully fill in the irregular surface. It is not necessary to permit the seams to dry before painting the remainder of the wall.

Pour paint into a flat pan and then use a roller to apply it into the flat surface of the paneling. Allow the first coat to dry before applying another coat.

See related

Why Can Holes Appear on a Brand New Concrete Driveway?

Concrete is a mixture of sand, crushed stone or gravel, and a paste consisting of water and portland cement. It becomes more powerful and harder to damage as it gets old, making it needed to get sidewalks and driveways. It can be tricky to pour successfully, so it’s important to avoid several problems which may cause the appearance of seams and bubbles known as “bugholes.”

Air

Air becomes entrapped in concrete throughout the mixing and pouring procedure. While some air is necessary to avoid harm when the concrete experiences freezing and thawing temperatures, too much causes bubbles or blisters on the surface which then dissolves into holes. This may be caused by improper mixing — the seams of combining remove excess air; too short of a drying period before the surface is smoothed down with a trowel or other instrument; or the surface isn’t smoothed correctly.

Water

Very similar to air, water is a necessary part of cement mixing. But too much moisture weakens the mix and also traps bubbles which work their way to the surface, causing bugholes. Water damage may also occur when the surface is completed off before appropriate “bleeding” period is supplied; this is necessary drying period which allows water and air to surface before the surface is smoothed over.

Release Agent

A barrier that’s used between hardened concrete and another surface — like the supporting timber used to mould a sidewalk or driveway — is called a release or demoulding agent. These chemical oily substances can cause difficulties in brand new cement if they are mixed into the cement, or even used in improper levels for the work. And just like water and air, they could cause holes to appear in which they come into contact with the brand new cement.

Other Factors

Pouring concrete could be tricky even when mixed correctly. Temperature and weather have to be factored in; tangible shouldn’t be poured in extreme cold or hot weather, or when it is raining. In case a thick slab of concrete is pumped, like for a driveway, it is going to require more “bleed time” before it is completed than for thinner slabs. If the subgrade — the surface below the poured concrete — is far cooler than the surface, additional time should also be awarded for bleeding before smoothing occurs.

See related

Sequence of Bloom to Perennials & Biennials

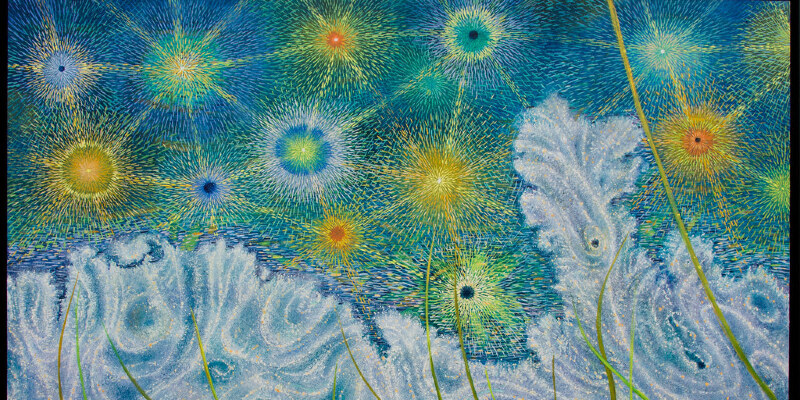
Flowers bloom at different times of the year. As an example, sweet peas (Lathyrus odoratus) bloom early spring, while chrysanthemums (Chrysanthemum morifolium), at U. S. Department of Agriculture plant hardiness zones 3 through 9, bloom in the fall. Some flowers, like clematis (Clematis), bloom in spring, summer or fall. Other flowers, like roses (Rosa), bloom from spring through early winter in USDA hardiness zones 8 through 10. Understanding when the flowers bloom helps a gardener organize the expression of the landscape and make sure that’s it colorful all through the year.

Biennials

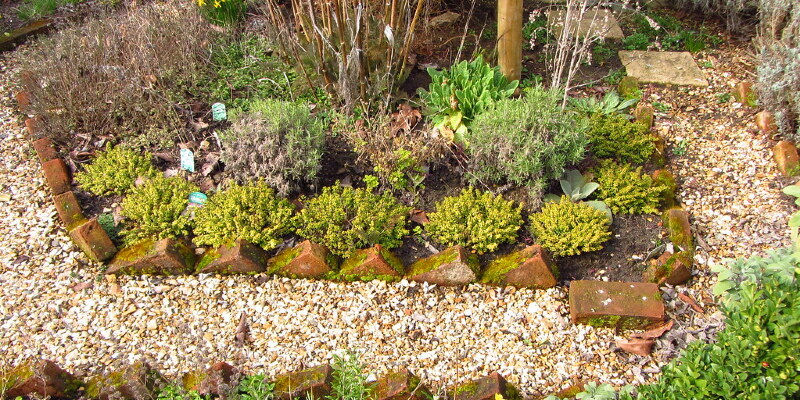
Biennials like hollyhocks (Alcea rosea), USDA hardiness zones 3 through 8, don’t bloom at all the first year. The energy of this plant can be used to develop a healthy bush with a strong root system. The plant blooms the next year, sets seed and then dies. Like annuals, some easily reseed themselves and develop season after season, giving the impression that they are perennials. Forget-me-not (Myosotis sylvatica), USDA zones 3 through 9, blooms in spring. Foxglove (Digitalis purpurea L.) blossoms in spring. It prefers cooler climates; nevertheless, 1 variety, “Spanish Peaks” foxglove (Digitalis thapsi “Spanish Peaks”), which rises in USDA zones 5 through 9.

Spring Perennials

Perennials contain spring flowering bulbs like freesia (Freesia), USDA hardiness zones 9 through 10, and iris (Iris ensata), USDA zones 3 through 9 . Other spring bloomers include pincushion flower (Scabiosa sp.) , USDA zones 3 through 9, which has been bloom until early fall, and bleeding heart (Dicentra spectabilis), USDA zones 2 through 9. It does not tolerate heat and shouted back in the summertime.

Summer Perennials

The summer garden is full of perennials such as yarrow (Achillea), USDA zones 3 through 9, with its flat head of hundreds of tiny blossoms in yellow, purple or pink. The blossoms are held over the plant’s foliage on sturdy stems. It’s a favored to dry. Coneflowers (Rudbekia), USDA zones 4 through 10, bloom with daisy-shaped flowers which have bright purple petals and a dark brown center.

Fall Perennials

Chrysanthemums are most likely the best-known fall flower. Colors include yellow, white, purple and rust. Among the flower forms are pincushion, quill and daisy. Flower sizes range from button mums, less than 1 inch in diameter, to spider mums, over 6 inches round. Asters (Aster novae-angliae), USDA zones 4 through 8, are another fall-blooming perennial.

Winter

Not many flowers bloom in the winter where the weather is cold and frosty. However, in warm winter areas like USDA hardiness zones 8 through 10, the fall perennials continue to bloom until early spring perennials take over. Geraniums (Pelargonium graveolens), USDA zones 9 through 12, pansies (Violax wittrockiana), USDA zones 4 through 8, and snapdragons (Antirrhinum), USDA zones 9 through 11, bloom as well.

See related

What Is the Difference Between Roses and Spray Roses?

Spray roses refer to roses that develop clusters of blossoms on one stem or branch. Contrary to long-stem roses that produce one bloom per stem, these roses create a spray of smaller blossoms and are generally sold as sweetheart roses at the florist. Spray roses can, however, be grown in a pot and are generally labeled as mini roses.

Rose Variety

Floribunda roses produce a few blossoms on a branched stem often called a spray. These flowers are nestled tightly in a cluster. Each bud opens separately. The spray of roses often contains climbed in various stages of adulthood, from tight buds to fully open flowers.

Use

Spray roses constitute the bulk of little bouquets and corsages, together with the foliage creating an attractive background for the brightly colored blooms. Sprays are ideal for little floral arrangements where bigger roses may be overpowering. They add a touch of romance to some setting or occasion.

Bloom Type

Like other roses, spray roses could be single, double or semi-double flowers. Single flowers have one layer of four to eight petals, while semi-double flowers have anywhere from eight to 25 petals. Double blooms could have up to 45 petals. Bloom color is similar to other fireworks, which range from white and pink to deep red.

Size

Spray roses typically have smaller blossoms compared to other roses. Because the flowers are close together, one spray resembles a little bouquet held together by thin stems that join a thicker main stem. Though there are exceptions, even with some full-length floribunda roses forming a spray, generally, spray roses are prized for their mini size and dainty cluster of blooms.

Potted Spray Roses

Spray roses grown in pots tend to be mini roses. These roses obtain their name from the blossom size — maybe not the size of the plant. When transplanted to the garden, or grown in a large container, mini roses often climb to heights of 12 to 36 inches.

See related

The best way to Age a Mantel With Stain

Aging a mantel with stain depends on planning than real stain application. Needless to say, you can not physically era a mantel using stain, but you can give it the impact of aging. The stain will accentuate the planning you have completed into the mantel to give the whole surface a worn and antique look. Almost anyone can attain this effect with common household items and a few imagination. The mantel, nevertheless, must be free of any original finish before you begin the aging process.

Strip the first finish off the mantel using a chemical stripper, if applicable. Put on rubber gloves and then brush the stripper onto the finish. Permit the stripper to dissolve the first end for the time recommended by the manufacturer, then scrape it off using a drywall knife. Wipe off the residue with old rags. When the surface is dry, sand it using 200-grit sandpaper to smooth it out.

Distress the surface of the mantel using various household items to create dents, dings and scrapes. As an instance, make deep scratches in the surface using an old-style bottle. Put a handful of screws within a plastic bag and then throw them against the surface. Hammer dings and dents into the mantel with a hammer, then make a few deep surface holes using a hammer and a middle punch, and take the claw end of the hammer and then scrape it across the grain in several places.

Sand the surface lightly with 200-grit sandpaper. Only sand enough to eliminate any possible slivers or sharp edges.

Brush on a stain of your choice, but darker stains function better in this example. Gently wipe the stain off quickly using a clean rag. Attempt to maintain the rag on an even keel with the horizontal plane of the surface. This enables the stain to pool within the distressed places to accentuate the scrapes, dings and dents.

See related

Landscaping: How to Remove Briars & Vines

Briar patches are thickets comprised of the overgrowth of plants, like blackberry or raspberry shrubs, which are both unsightly and potentially harmful due to their thorny vines. Frequent vines that prove troublesome to the landscape contain wild grapevines and ivy, with both becoming intrusive, invasive and detracting from the appearance of other plant life. Although tedious, based on the amount of growth, briar and vine removal is an issue of eliminating them in the source and following up with a chemical herbicide.

Ivy Vines

Sever that the ivy vines 5 feet up from the ground with bypass pruners or lopping shears.

Grasp an ivy vine and pull it up from the ground. Cut the vine with lopping shears or bypass pruners 12 inches from the base. Put the cut vines aside in a stack. Repeat with the other vines.

Dig around the base of the vines with a garden trowel or scoop shovel and lift the root system from the ground. Put the root system and attached vines in the stack.

Spread out the vines on the ground and spray with an herbicide containing the active ingredient glyphosate, in accordance with manufacturer’s instructions. Even though the vines will die from dehydration, herbicide accelerates the procedure.

Grapevines

Cut the grapevines 1 foot from the ground with bypass pruners or lopping shears. Allow three to six months to your stumps to create leaves.

Spray the stumps and leaves with an herbicide that has glyphosate as its active component, according to the manufacturer’s minimum labelled speed of program. Allow two weeks to the herbicide to take effect.

Pull the hanging stumps out when they decay and die and discard them.

Briars

Dig around the base of the briar plants with a scoop shovel. Using the shovel for a lever, reach under the root ball and then lift up to dislodge it from the ground.

Grasp the briar plant near the base and remove it from the ground. Put the briar plant in a receptacle and carry it into your disposal area. Although cutting edge briars kills them fully, check with the community municipality for guidelines concerning open flames.

Apply herbicide featuring with glyphosate as its active component in accordance with the manufacturer’s education to the place you removed the briar patch from.

See related

Copyright h o m e s t a y b e i j i n g 2 0 0 8 2024