How Much Sun Does a Watermelon Plant Need?

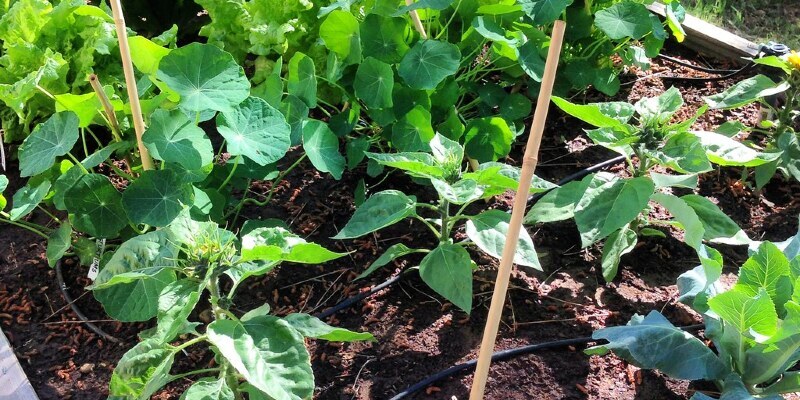
A prosperous home watermelon crop begins with choosing the proper watermelon variety to your area. Most varieties are best suited to southern growing regions, however there are varieties that grow well in northern regions. Watermelons require a long-growing season using a warm summer, humid atmosphere and lots space. These melons are easy to grow when planting in fertile, well-drained soil with complete sun.

Full Sun

Watermelons need full sun for proper growth. For full sun, choose a place where watermelons get eight to ten hours of direct sunlight. The plants need sun to stay healthy and productive. Choose a garden place where trees, buildings or other constructions don’t block sunlight and shade the plants. Watermelons also benefit from black plastic mulch to help attract sun and heats the soil, as these melons need warm soil temperature for proper growth.

Effects of Not Enough Sunlight

Watermelons grown under cloudy circumstances or that don’t get enough sunlight frequently create badly flavored fruit. Sunshine warms the soil, and watermelons need soil temperatures over 60 degrees F for their roots to absorb water. When the sunny weather yields, moisture evaporates from leaves faster than roots absorb water, resulting in rapid wilting and plant death. Transplants can suffer from lack of sunlight too; fresh plants which endure cloudy or rainy weather for four or more days can die.

Warmth

Warm air temperatures are important for watermelon development, and glowing, summer weather provides the correct growing temperatures. Watermelons are pollinated by insects, such as the honeybee, and cool, wet weather slows honeybee activity and affects the flower structure, preventing the release of pollen while the pistil is receptive. Poorly pollinated watermelons produce misshapen fruit. Watermelons need warm temperatures to produce sweet fruit. Seeds need warmth to germinate also. For success with germination, ensure soil temperatures are between 65 and 95 degrees.

Tip for Growing Watermelons

Plant watermelons after all risk of frost have passed, because they cannot withstand a light frost. Watermelons need good air circulation, so space them about 6 to 12 feet apart. Maintaining the melons sufficient space and sun keeps them moist and helps to avoid infection. Watermelons will need to remain evenly moist and never permitted to dry out. Watermelons are ripe if they create a dull thud when thumbed. When selecting, it is best to cut them from the vine and not pull them.

See related

Pear Tree Is Turning Yellow

Grown for their lime-green, bronze or bronze deep-red fruit, dazzling spring flowers or glowing fall leaf, pear trees (Pyrus spp.) Make a striking addition to your lawn. Less temperamental and disease-prone than plum, peach or apple trees, pears seldom need pruning to make the most of their flower or fruit production. A pear tree with yellowing leaves is a pear tree in trouble. Speedy diagnosis and restorative activity give it the best chance of recovery.

Pre-Emergent Herbicide Damage

Pre-emergent herbicide sprayed to avoid weeds around pear trees often causes chlorosis, or yellowing, as leaf borders and between leaf veins. Leaf death might occur. Old leaves endure the most damage.

Nitrogen Deficiency

Smaller-than-normal leaf and yellowing old leaves dropping from their stems signal a pear tree with nitrogen deficiency. This rare condition requires lab leaf analysis. Scattering high-nitrogen urea fertilizer and watering it in the dirt around the tree corrects the deficiency. Repeat just with a rediagnosis of the problem.

Iron Deficiency

Iron deficiency produces green-veined, yellow fresh foliage. In severe situations, the stunted leaves are almost white, with yellow borders and suggestions. Root damage and poorly drained or compacted dirt multiply the consequences. Treat iron-enhanced fertilizer. Iron chelate applied to the ground, or iron chelate foliar spray, provide temporary remedies. Always utilize fertilizers, soil amendments and foliar sprays in the company’s recommended strength.

Potassium Defieciency

Calcium deficiency causes chlorotic leaf margins and interveinal tissues. Damage spreads, finally killing the whole leaf. It looks first on recently matured foliage that will wrinkle and curl over time. New growth dies back in the year. Potassium nitrate or potassium sulfate worked into the ground, or routine feeding with a potassium-enhanced complete fertilizer, restore potassium levels.

Managanese Deficiency

Manganese-deficient pear trees have green-banded, yellow fresh leaves. Since their manganese stores decrease, dead spots develop between their veins. This deficiency generally affects plants in poorly drained or alkaline soils. Incorporating a dose of manganese sulfate into the dirt addresses this lack. Manganese-chelate foliar spray temporarily relieves the symptoms.

Zinc Deficiency

Zinc-deficient pear leaves are small, pointed and narrow, with a solid-yellow shade. They sometimes have dead patches. Pear leaf opening in dense tufts in the ends of very slender limbs is a classic indication of zinc deficiency. Alkaline or phosphorus-rich soils and superficial cultivating practices all contribute to the problem. Zinc-enhanced fertilizer heals the lack. For rapid-but-temporary progress, utilize zinc chelate foliar spray or soil amendment.

Pear Psyllas

Pear psyllas, miniature, reddish-brown winged insects, lay yellow eggs that hatch into yellow nymphs. The feeding nymphs inject leaf-yellowing toxins into the pear tree foliage, threatening its development and fruit production. A late-winter spray of petroleum-oil implemented in January or February, before the adults lay eggs, controls psylla residents.

Pear Scab

Pear leaves with yellow spots progressing to dark olive-green suggest a scab infection. The leaf may crinkle, twist or fall as the fungus progresses. Scab strikes in spring, when rain or irrigation splash spores from fallen to healthy leaves. Management includes immediate removal and destruction of the dropped leaf and morning watering to shorten drying time.

See related

Temperature for Bonsai Orange Plants

Selecting an orange variety that’s suitable to miniaturization is key to cultivating a successful bonsai orange plant. Calamondin (Citrus mitis) and Satsuma mandarin (Citrus reticulata) are two types that adapt well to bonsai treatment and are hardy from the Mediterranean climate. As with any citrus tree, they require full sun with plenty of bright light every day to thrive. If exterior temperatures require that the plant be grown indoors, the gardener will need to take particular care to set the orange plants in a well-lit window or greenhouse where they can get adequate light and warmth for best results.

Hardiness Zone

The Calamondin (Citrus mitis) orange is hardy in U.S. Department of Agriculture plant hardiness zones 9 to 11. The Satsuma mandarin (Citrus reticulata) is hardy in zone 9. Move both indoors when overnight temperatures drop below 25 degrees Fahrenheit.

Cold Tolerance

The University of Florida reports that dormant, older Satsuma mandarin trees have been known to withstand temperatures as low as 14 degrees Fahrenheit without harm. The Calamondin is the hardiest of this true citrus, withstanding temperatures as low as 20 degrees Fahrenheit.

Germination

If starting an orange tree bonsai from seed, monitor the soil temperature for optimal growing conditions. Because of citrus, orange seeds germinate best in a temperature selection of 64 to 72 degrees Fahrenheit. Maintain the seedlings moist but not waterlogged by spraying or dipping the pots in a water bath; this allows the soil to absorb water from the bottom up to prevent overwatering that prevents germination and suitable growth.

Maintenance

Orange plants grow best at temperatures between 70 and 90 degrees Fahrenheit and may be placed outdoors during warm, summer months. When overnight temperatures drop below 55 degrees, orange increase will slow or stop. Although both the Satsuma and the Calamondin orange plants can withstand lower temperatures, it’s wise not to stress young trees too much from the first few decades, but keep them warm enough to support vigorous growth and growth.

See related

Holly Bush Leaf Disease

Holly (Ilex spp.) Is a large genus of evergreen and deciduous trees and shrubs which — depending on the species — grows at U.S. Department of Agriculture plant hardiness zones 5 through 11. After the foliage of the holly bush begins to discolor, wilt or fall prematurely, you know something isn’t right with the plant. Unfortunately, various diseases attack holly bushes, resulting in damaged foliage. Identifying the offender is the first step in controlling the leaf infection. Once identified, treat according and implement preventive steps to protect the holly bush from future diseases.

Cylindrocladium Leaf Spot

Cylindrocladium leaf place presents itself as small, circular yellow discolorations on the holly bush foliage. Because the stains mature, they begin to darken to hues of tan or brown edged in blackish purple. Infected foliage falls from the holly and branch dieback happens. Controlling this respiratory disease starts with removing the infected branches with pruning shears and fixing the bush using 2 applications, 14 days apart, of thiophanate-methyl fungicide. This fungicide will also help stop the disease if implemented continuously throughout its growing stage starting at bud break with 14-day periods.

Anthracnose

Anthracnose strikes American holly (Ilex opaca), Chinese holly (Ilex cornuta), English holly (Ilex aquifolium), winterberry (Ilex verticillata) and inkberry (Ilex glabra), causing brownish blotches to look on the foliage. Pinkish-orange spore masses will develop within the blotches, and dieback may occur. Fungicides containing chlorothalonil or thiophanate-methyl implemented in late spring can protect against anthracnose from damaging the holly bush. There is absolutely no effective chemical control once the holly bush becomes infected with this fungal disease. If the bush develops this fungal pathogen, prune diseased branches off the holly to help stop it from spreading.

Internet Blight

Internet blight is prevalent in humid, warm weather conditions and typically affects holly shrubs with dense canopies and poor air flow. Holly bushes infected with web blight develop brownish spots in the bottom and edge of the foliage. Because the stains mature, they develop larger and darken to a black shade. These spots may cover whole leaf surfaces and will either fall from the bush or cling to the stem. Fungicides containing thiophanate-methyl, iprodione and chlorothalonil help prevent web blight but won’t cure the fungal infection. Along with preventive fungicides, make certain holly bushes are spaced far enough apart to permit air flow between the plants and through their foliage.

Botryosphaeria Canker

Botryosphaeria canker can affect most species of holly and generally appears after extreme fluctuation in temperature or after periods of drought. The leaves of infected plants begin to yellow and fall from the bush. Stems begin to girdle and dieback happens. Cankers develop on the rectum and can enlarge, girdling that limb. If not treated, the whole holly bush can succumb to the disease. No chemical treatment will control botryosphaeria canker, and emphasis is on appropriate maintenance techniques. Only develop the holly bush in well-drained soil and add mulch around the plant. The mulch protects the holly’s roots from abrupt temperature fluctuations.

See related

How to Replace a Deadbolt That's Stuck in the Framework

A deadbolt lock is a vital part of any home security program. The deadbolt is a lot stronger compared to the doorknob binder, however it needs to operate properly to succeed. Because most wooden doors may swell or shrink slightly due to humidity variations, a seldom-used deadbolt lock can occasionally become wedged or inoperable. It is possible to get rid of a deadbolt that is stuck in the framework and then replace it with a brand new deadbolt in a couple of minutes using some basic hand tools.

Loosen the mounting screws on the deadbolt cylinder to the interior of the door with a Phillips screwdriver, and pull on the cylinder away from the door. If the cylinder is stuck, then add a flat-head screwdriver under the edge of the cylinder and then gently pry the cylinder in the door.

Eliminate the exterior cylinder in the outside half of the door in exactly the same manner as the indoor cylinder.

Slip a sturdy screwdriver through the backset of the deadbolt mechanism within the hole in the door, and pull on the backset toward the middle of the door to release the deadbolt in the framework. If pulling the backset will not discharge the deadbolt, tap on the side of the screwdriver with a hammer to remove the deadbolt in the framework.

Open the door, and loosen the two screws that hold the deadbolt’s mounting plate into the edge of the door. Slip the damaged deadbolt from the door.

Insert the new deadbolt into the edge of the door, and attach it to the door with the two included mounting screws.

Slip the connecting rod in the deadbolt kit’s exterior cylinder into the backset and place the cylinder into place against the door. Then put the matching inside cylinder over the connecting rod against the inside of the door. Tighten the two mounting screws to connect the cylinders into the door.

Test the activity of the deadbolt from the the inside and outside cylinders prior to closing the door. If the deadbolt doesn’t slide freely, loosen the mounting bolts to the inside cylinder one-quarter flip and test again. You can also apply a little bit of locksmith’s graphite into the extended deadbolt to soften the mechanism.

Loosen the two screws that mount the old deadbolt strike plate into the frame of the door, and remove the old strike plate. Place the new strike plate over the mounting holes, and attach it to the frame using the mounting screws.

Shut to the door and test the performance of the deadbolt. If the bolt doesn’t close correctly, adjust the position of the strike plate in the door frame until it operates as anticipated.

See related

Do-It-Yourself Window Treatments for Plantation Blinds

Plantation shutters and blinds offer casually classic appearances with the functional benefits of light control and insulation. Even though they’re often seen gracing the window, you may want to boost your blinds with a window treatment that adds color, curiosity or a tie-in with the room’s decor. Building a simply-styled curtain, cornice, valance or wall edge is in the reach of most do-it-yourselfers. When deciding what size treatment you require, be sure to permit room for clearance at the top and sides of the window frame, so your shutters and blinds may operate correctly.

Simple Curtains

Simple curtains, composed of textile panels hung in the pole by clip-on rings, give a fashionable accent that doesn’t conquer your plantation blinds. Plain, textural materials such as muslin, burlap, linen blends or canvas are in keeping with the plantation theme, but you may use any color or print that suits the room’s decor. After measuring your windows, including clearance at top and sides, determine the size of your completed panels, which collectively must be 1 1/2 times the window width. You can use pre-made panels or make them from textile yardage, sheets, tablecloths or a canvas dropcloth. Machine-sew hems on all four sides, or even make a no-sew version by ironing the hem with fusible tape. Clip the curtain rings evenly across the panel’s top edge, spacing the rings around 6 inches apart. Thread the rings onto the curtain pole, and fasten the pole in its wall brackets.

DIY Cornice

A cornice box may be the crowning glory of your own farm blind window treatment, plus it doesn’t need to be a complex woodworking task. You can produce a cornice from lightweight materials such as foam core or cardboard. Fashion the box as an open, shallow “U” shape that fits on the top of the window frame, allowing for clearance so the blinds function correctly. Wrap the front part of the cornice with the decorative fabric of your choice above a layer of quilt batting to pad the structure. Tape the cloth and wrap on the inside of the cornice with packaging tape, or fasten it with pins. Hang the cornice with adhesive picture strips or by attaching it to your U-shaped metal curtain rod and brackets.

Roman Shade Valance

The soft, horizontal folds of a Roman shade echo the horizontal lines of plantation blinds. Building an accurate Roman shade that pulls up and down together with cord is an involved DIY project. A simpler approach is to produce a Roman shade valance that has the horizontal folds, but doesn’t move. Make a fabric panel that covers the width of the window frame and is one-half to two-thirds as long. Make horizontal pleats throughout the width of this panel to pull it up to the desired span. Stitch or tack the folds to hold them in position, and hang the valance from a curtain pole or mounting board.

Decorated Wall Border

A decorated edge on the wall around the window creates interest and may visually expand the window to give it more impact within the room. This is a powerful choice for plantation shutters since there’s absolutely no cloth to interfere with their operation. Although painting a freehand edge is really a personal touch, you don’t need to be artistically inclined to utilize this result. You can apply a wallpaper border around the window frame, like. Or, stencil a repeated pattern to produce the edge. Craft and home improvement stores sell wall stencils, paints and accessories, along with instructions and, from time to time, free tutorials on how to use them.

See related

How to Put Curtains on a Long Narrow Window Above My Bed

Placing a bed beneath a window is often considered a decorating no-no. The arrangement presents decorating challenges — especially if the window is thin — but it’s sometimes necessary due to the room. If you have to place your bed beneath a narrow window, leaving the window undressed or under aroused only emphasizes its clumsy dimensions. Rather, hang curtains in order that they stretch past the window’s frame and create the illusion that a larger window lies behind them.

Position the Bed

When you have to place your bed below a tall, narrow window, then use the arrangement to your advantage. Your bed will help camouflage the awkward window, and also the window covering you pick might accent your bed’s headboard — or even substitute for one. Center your bed beneath the window, enabling adequate floor space around its foot and sides. Measure the width of your bed and the height of the wall behind it. Once installed, the curtains should equal the width of your bed. Hang them near the ceiling and nearly to the floor. But confirm they don’t interfere with floor or wall vents.

Choose the ideal Curtains

Whether you get your curtains or make them yourself, then you’ll need two panels whose combined width is double the width of your bed. As you’re making the illusion of a larger window, then start looking for closely woven opaque fabrics instead of lace or sheers. When an expanse of bare wall is visible through the curtains, the illusion will not be prosperous. Select light-blocking or sealed drapes — if lighting and temperature management are worries — since the window is directly above the bed. Some curtain fashions move better on a pole than others. Grommet- and tab-topped curtains easily slide to every side of the window. Should you use rod-pocket curtains, tiebacks can pull the curtains from the window.

Install Hardware and Rods

When you shop for curtain rods and brackets, don’t procrastinate. Verify the rod is strong enough to hold the curtains you opt for, and the mounts must hold the pole securely and safely. Choose a rod style that complements the curtain material along with the room’s decor along with other hardware. To install the curtain pole, follow the manufacturer’s directions and use the right fasteners. Since the mounts are being mounted onto drywall or plaster instead of wood trim, they must be secured to a wall stud inside the wall or secured with anchor or toggle bolts. Use a measuring tape to mark the position of the mounts onto the wall a few inches from the ceiling and equal to the width of the bed. Test the pole to confirm it’s straight and protected in the mounts before you hang the curtains.

Add Finishing Touches

Your new curtains create an appealing backdrop for your own bed while hiding a tall, narrow window. When you want to let the sunshine in, open the curtains just to the width of the window to keep up the illusion you have created. To store the panels in place when they’re open, install a decorative bracket to either side of the window framework mid-way. Made from wood or metal in a number of fashions, the brackets give your window treatment a completed look. You may also use fabric or tasseled tiebacks and secure them into the window with little hooks. If your curtain rod contains plain finials, swap them out for finials produced from glass or cast metal in a style that suits your bedroom’s decor.

See related

Inexpensive Ideas to generate My previous Bathroom Vanity Appearance Brand New

Give a vintage bathroom vanity a fresh new look instead of replacing it completely. Take a look at the vanity as a whole to ascertain what about it bothers you the most and focus on that area. Sometimes, jazzing it up may be as straightforward as replacing the hardware on drawers and doors, or even dressing up the door and drawer fronts to provide them a bit more character. Paint offers another inexpensive way to earn the vanity look new, whether painting the bit a good color or giving it a antiqued or distressed look.

Hardware Assist

Outdated, worn or hardened hardware drags the look of the whole vanity, even when vanity itself is in great form. Replace all of the old hardware, such as door hinges, with bits matching different metals in the room: If the toilet’s towel bars have a platinum finish in a sleek style, seek out vanity handles, hinges and knobs which stylistically match. For an even less costly revamp, clean up the outdated hardware and repaint it to match the other metal components or fittings in the bathroom.

Color Change

Whether the present evaporate end is painted, varnished or laminated in a finish that doesn’t match the room’s decor, then a fresh paint color completely changes its look. Clean out the vanity and remove or mask off the sink and hardware with tape. Sand, then unlock it using a primer designed for the stuff. Paint it with a few coats of a washable, moisture-resistant interior latex paint such as a high-quality satin paint. Seal it with polyurethane later, if you prefer, for extra protection. Should you prefer a pattern apart from a good paint color, create a layout such as chevrons or stripes using strips of painter’s tape to plot out the layout, or provide it a shabby chic- or even cottage-style makeover by painting it one color, rubbing wax above it, then painting it a second color, sanding through the topcoat in some places. Scrub stain or nesting glaze over the whole painted vanity; then wipe off it all, to provide an old look in another manner. Gray, yellow or brownish add an aged look. Test an inconspicuous area first to ensure you like the glaze or stain color.

Go Faux

Sometimes, the base of this vanity suits the look of the bathroom space, while its nesting laminate top reflects a color selection from decades gone by. Sand the laminate top gently to earn a primer stick better; subsequently apply a primer specifically designed for slick surfaces such as laminate stuff — some companies provide paint made just for countertops. Paint the countertop with a faux stone finish such as granite or marble using latex paints — apply a base coat in the dominant stone color; then sponge or brush on tinted glazes containing different colors found in the stone you wish to copy. A feathering brush helps soften the transition from one shade to the next. Use a real feather or an artist’s brush to add the veins found in marble. Practice your faux-stone techniques on scrap cardboard or wood to have a feel for color-blending for a more realistic effect.

Alter the Base

Give an inexpensive vanity an update that costs little but appears lush simply by replacing the base with bun feet or furniture legs. The new legs make the vanity look like a high-end bit of repurposed furniture instead of a straight-from-the-store cupboard, particularly if you repaint the vanity and add new hardware. Based on how your vanity is made, this may necessitate propping up the present cabinet since you operate, or completely dismantling the vanity to get the bottom of the cupboard to add to construct a supporting frame to attach the toes after you remove the present indented base. New furniture feet or legs are available from home improvement stores.

See related

Copyright h o m e s t a y b e i j i n g 2 0 0 8 2024