The best way to Cut Back Penstemon

Native to the West Coast from Canada to Mexico, penstemon (Penstemon spp.) is a huge genus of plants, most of which bloom colourful bell shaped flowers in the spring. You need to care for the penstemon variety in accordance with its particular requirements, but most could be pruned in a manner that is similar. Pruning assists a penstemon sustain a manageable dimensions and keep neat and tidy. It can inspire another set of blossoms later in the period.

Remove spent blooms using a pair of garden clippers in the spring. Clip each stem back to facet stem or a leaf node. This encourages penstemon to put another set of blooms forth in the period, typically summer or early fall.

Prune penstemon in cold temperatures. Clip stems back leaving the foliage that grows close to the bottom.

Cut back dead or broken stems or foliage any time throughout the year. Clip straight back into a area that is healthy, ideally just above facet or a leaf node stem.

See related

The best way to Take Down a Soffit in Your Kitchen

Soffits in kitchens have fallen from favor, as they usually do little except protect the region involving the ceilings as well as the cabinet tops. Ripping out them enables one to replace your existing cupboards with ones that offer shelving and touch the ceiling and storage storage space. This task also provides a more contemporary look to kitchens in an older house. This work is a one, therefore first protect your counters with plastic sheeting to to recapture much of the particles.

Stand on a a ladder or on a countertop that is safe. Locate the vertical supports by-passing an electronic stud finder established on the “wood” environment within the dry wall on the front face of the soffit. Cut using a utility knife an approximately square peep-hole about 4″ across through the dry wall at the center of the soffit, steering clear of the the supports.

Examine the the inside of the soffit using a flashlight, searching for wiring, plumbing pipes or drains or ventilation ducts. Make plans to re-locate any ducts, pipes or wiring after demolishing the soffit, or to make an inferior chase about them. In case you are not experienced in constructing chases — essentially a soffit that is significantly smaller — or re-locating pipes any re-routing programs using a certified general contractor.

Score using a utility knife the dry wall tape where it connects the ceiling as well as the soffit to protect the ceiling dry wall from tears. Bang a gap to serve as a hand-hold in the dry wall using crow bar, sledge-hammer or a mallet. Reach to the hand-hold and pull difficult to rip out the dry wall. Make extra hand holds before it is possible to rip out the drywall as-needed for the sides of the soffit.

Examine the now-exposed framing for the soffit, which might be 1-by-2, 2 by- 2 2-by or 2 -4 lumber. Look for whether the supports are attached to to the cleats that are horizontal in the leading, bottom and again of the soffit with nails or screws. Hit crow bar or a chisel having a mallet into joints that were nailed to pry them apart. Unscrew joints produced with a phillips-head bit inserted right into an energy drill with screws.

Remove and lay on the counter every one of the framing pieces. Bag and eliminate dry wall particles, the framing and sheeting, and sweep dust-off the kitchen flooring.

See related

The best way to Grow Gentian

Gentian (Gentiana) bears cobalt blue, trumpet-shaped flowers growing on short comes from green, mat-like foliage. Native to alpine areas, gentian grows through the United States in temperate climates. Gentiana affinis “Ovata” is a California native-plant, blooming in June and July. Grow tiny species of gentian, including Gentian acaulis, in rock gardens, or plant better quality species, including willow gentian (Gentian asclepiadeas) in borders in partial shade where summers are warm and dry. Gentians usually develop in symbiosis with fungi that are specific. Seeds with acid — a derivative of Gibberella fujikuroi fungus. Cold stratification assists seeds break.

Seed Propagation

Seeds with acid. Fold a paper towel into a square measuring 4 1/2- by-4 1/2 inches. Dampen the paper-towel. Lay a-3-by-3-inch bit of polyethylene plastic in the middle of the toweling. Cut a 2 1/2 by- of paper toweling and fold it into a rectangle 1/2 by-1inch. Moisten it and place it in the middle of the plastic. Seeds with this rectangle. Dip the end of a toothpick — the type which is rounded on both sides — in to the acid powder that is dry. Sprinkle the powder on the seeds. Keep the toweling flat and place it inside a plastic bag to to store moisture. Dip the paper toweling to float the seeds when seeds sprout. Pour the water above a seed prepared with seed- .

Seeds to assist in breaking. Using a seed-germination medium, sow seeds in a seed prepared in the spring-time. Place the bag and seal. Place the flat in a fridge for 8 weeks. Remove the flat in the refrigerator and keep in a place at 70 to 75 degrees Fahrenheit. Transplant seedlings to peat pots.

Plant gentian in moist, well-drained soil having a pH of 5.0 to 7.5 in Sunset’s Climate Zones 6 through 22. Grow gentian where summers are dry and warm, or in full-sun where summers are cool and moist. Small species, up to 6-inches, are spaced 6 to 12″ apart. Larger developing species are spaced 1 4 to 24 inches apart.

See related

Tips on Cleaning Brass Screws

Screws include a feeling of elegance to your own home. As time passes, they get filthy and produce a bluish green tinge recognized as a patina. You will find lots of ways to clean and shine the screws, including some organic techniques when you have eliminated your screws. In case you if you choose to to shop the screws, the need can be reduced by cleansing them correctly first if it is time for cleansing.

About Brass

A steel alloy composed of zinc and copper, brass, is a conventional steel used to produce several family products, including screws, light fixtures, door knobs and candlesticks. When it is exposed to the air, it oxidizes to the bluish green patina. This patina clear and can keep the brass from seeking shiny. Some brass items, including screws, are really steel-plated with brass. These items tend to rust rather of oxidize. By attempting to select them up using a magnet test your screws; correct brass does not adhere to magnets. In the event your screw is attracted by the magnet, the screw is brass-plated metal, meaning brass cleansing techniques that are conventional will not be be successful. It’s possible for you to remove the rust with good-grade steel-wool, but it’s probably to eliminate the brass plating at the same time.

Natural Techniques

There is no need to purchase brass cleaners that are costly when there are lots of cleaners to pick from. Start with water as well as several drops of dish washing liquid. When the screws are dry, rub them using a lemon or protect them in a paste of equal elements of vinegar, flour and lemon-juice or table salt. When the paste dries, rub the very top of the screw as well as the threads having a tooth-brush that is damp and wipe it off using a micro fiber fabric. Be cautious using and certainly will scratch the brass — mild rubbing is crucial. Cleaners you probably have in your ice box contain ketch-Up and Worcestershire sauce. The two of these have enough acid to assist clear the screws and eliminate the patina.

Chemical Techniques

Some brass cleaners include abrasives that scratch the brass, from remaining clear for lengthy, avoiding the screws. In the event the techniques that are normal are not acquiring your brass screws clear to your satisfaction, pour some hotwater and and handful of of ammonia — about eight component ammonia to eight to 1 components water. Scrub them beneath the water using a toothbrush subsequent to the brass screws have soaked for a number of minutes. Rinse them with water that is clear, then enable them to dry. As an alternative to using ammonia you are able to also combine one-part bleach with two components water.

Polishing

Subsequent to the screws are clear, it really is time to make them shiny and vivid. There are techniques to generate your own even though you’ll be able to purchase brass polish. Mix whiting or baking-soda — a finely-ground chalk accessible for the most part paint retailers — and boiled linseed-oil and rub it on the screw having a micro fiber fabric. Apply a slender layer wipe a-way and of vehicle wax to the screw. Dip a cloth to the vinegar after which into salt another idea will be to heat some vinegar and wipe the fabric within the brass screws.

Storage

Cleansing them can lessen the a-Mount of patina that may develop, in the event that you are organizing to shop your screws and scrubbing needed to get your screws shiny. Drop them in a zip-leading bag using rice to absorb dampness or a pack. Do not place them in a brown-paper bag or with rubberbands, equally which include oxidizing brokers that can motivate a patina to produce on your screws.

See related

The best way to Get a Monkshood Plant to R E-Bloom

The monkshood group of of crops (Aconitum spp.) provides drama to the shade garden. Monkshood is hardy in Sunset’s Environment Zones A1 to A3, 14 to 21 and 1 to 9. With respect to the selection blooms any time between midsummer and late summer with spectacular 2- to 5 foot-tall spires of helmet or purple -shaped flowers. The handsome, shiny foliage of the plant emerges very early in the spring. Interesting kinds of monkshood contain Aconitum septentrionale “Ivorine,” with flowers of creamy-white, and Aconitum cammarum “Bicolor,” with blooms streaked with white and blue. One of the tallest cultivars, the amethyst blue-flowered Aconitum henryi “Spark’s Range,” reaches more than 5 5 feet tall if staked, but otherwise tends to vine and can also be trained to a trellis.

Put because all elements of the plant, such as the roots, are toxic, before working with monkshood. Clean with soap and water instantly in the event that you inadvertently expose your skin for this this plant.

Use pruning shears to cut the stems to buds back following the first flush of bloom is is completed. This may encourage another round of blooms in the period.

Deadhead invested flowers in the drop in the next flush of bloom, utilizing the same technique as 2. In the event the foliage appears pale or tatty, reduce the plant down to its development. It’s feasible that even the basal development will generate some flowers.

Fertilize the plant as a result of its its bloom of the time using a general purpose fertilizer. Allow the development to stay on the winter.

Trim off any unsightly or dead foliage in the spring. Fertilize the plant using a general purpose fertilizer.

See related

Amaryllis Borer

The Amaryllis borer is native to the coastal regions of the Mediterranean, but has spread to other places across the planet, wreaking havoc on crops every where it goes. As soon as this caterpillar takes hold of a plant, it could quickly ruin it, that’s why prevention and vigilance are the most useful way to combat this plant pest in the backyard. Fortunately, you can find both chemical and organic techniques that can kill these borers when they slip past your defenses that are greatest.

Identification

The Amaryllis borer (Brithys crini pancratii) is also called the lily borer, crinum borer or Kew Arches. The body of the caterpillar is yellow with colorful orange-yellow and black rings and has black dots like eyes on the foundation and the the top. The fully grown caterpillar is while the adult moth has wings about this span about that size.

Behavior

Lily borers choose crops in nerine households and the crinum, amaryllis, clivia, cyrtanthus, haemanthus. The caterpillar is energetic in months if it is damp, humid or warm. It lays its eggs on the under side of leaves in colonies and tunnel to the leaves to feed. Larvae consume the bulbs and may tunnel into. The tell-tale sign that you just have got an infestation is sub-laminar tunnels, that’s when you will need to take an insecticide. The bugs can cause enormous harm, killing the host crops if left untreated.

Chemical Therapy

The greatest time to examine your crops is in the first morning, because the bugs hide by day and feed at night. After you have established your crops are infested, use a chemical developed for managing butterfly caterpillars or moths in a full cover spray. Baythroid, the pyrethroid insecticide, is a successful, having a low-toxicity to the surroundings. Professional growers frequently handle crops that are contaminated with sulfur to aid stop infestations that may occur on leaves that are broken.

Natural Therapy

In case you catch the borers early inside their life cycle, you’ll be able to hand- both squash them or drown them and choose them from your plant leaves. They’re able to be cut off and ruined, if only several leaves are impacted. Using little nematode worms that were helpful is frequently employed to to manage caterpillar infestations, but it’s not efficient against Amaryllis borers.

See related

The best way to Create Compost Piles Heat Up Faster

A properly-made compost pile reaches inner temperatures of 130 degrees Fahrenheit or more, killing weed seeds and all illness pathogens, insects . Composting needs appropriate administration of the nitrogen and carbon elements in the pile to generate the warmth that is required. A pile that is warm breakdown components in as little as two weeks, as it pertains to compost, even though 2 to 3 months is nevertheless regarded fast and can compost. Speed up the procedure by carefully controlling the quality of the pile and with regular servicing.

Use materials that is little in the pile. To ensure they’re no longer than 1 1/2 inch. chop leaves Operate them via a mulcher in the event that you include branches to the pile. Parts that are smaller compost more rapidly than big items.

Combine nitrogen-rich components, including plant trimmings and grass clipping, with carbon- components, like sawdust and leaves. Alternate A4-inch layer of materials using a 4 inch layer of materials that is brown. The mixture of carbon and nitrogen outcomes in composting and even warmth.

Sprinkle 1-inch of healthful backyard soil involving the levels in the pile. The soil contains micro-organisms that pace the normal decomposition of the pile. Add 1 cup of a large nitrogen 36-0-0 fertilizer blend for every 8-inch lay%0trogen 36-0-0 fertilizer blend for every 8-inch layer of materia36-0%0cup of a high nitrogen 36-0%0-0%0cup of a high nitrogen 36-0-0 fertilizer mix for every 8 inch layer of materials to further velocity heating.

Construct the pile in a sequence of 8 inch levels to ensure it steps between 3 and 5 feet square and is no over 3 3-feet high. Compost heats in a pile of the size.

Water the pile to ensure it is evenly moist but not soggy. A pile that is dry compost and will not heat-up. Overly piles that are moist compost gradually.

Turn the pile every three to 7 days using a garden fork, if it feels dry and water the pile. Frequent turning mixed with moisture-management results it even composting and fast heating.

See related

The best way to Thread Cord on Curtain Rails

For those who have curtain traverse rods or rails with pull cords in order to open and shut the drapes, the cording receives lots of wear and tear. The cording might break and starts to frazzle. When you see indications of use, it’s time to install new cording. It’s maybe not a hard process. Look to get a product that can work in the notions department of a stitching shop in the event that you are unable to find cording that matches what’s around the curtain rails.

In order to access the cording remove the curtains in the rods.

Measure the rod’s size while it’s still on the wall. Measure the the length from your floor to the very best of the curtain rod. Add these two totals together and add 6″ to permit mistakes. That amount to decide just how much cording that is new you require to complete this task.

Remove the curtain rod in the wall and place it using the pulleys facing on a worksurface. Pull the aged cording.

Insert the conclusion of the cording within and up the pulley. Insert the end of a hook or opened paper clip to the cording to help if required, guide it over the pulley.

The cording underneath the slides on the side of the rod, utilizing clip or the hook as a manual. Push the cording beneath the the left learn provider and pull it out the first hole — the one on the left. Put a double-knot in the finish of the cording. By pulling on it from the aspect of the curtain rail pull the slack out from the cording.

Run the end-of the cording involving both pulleys on the left side of the curtain rail. Use the hook or clip to pull the cording out the other facet. Push the cording below the slides and also the grasp carrier that is left. Go beneath the the master provider that is proper and pull up the cording through the hole in the carrier that is best. Insert the cording to the hole on the best side of the master provider that is proper and b-ring out it on the correct side of the provider. Feed it on the best side of the rod beneath the the slides.

Direct the cording involving both pulleys on the proper side of the rod. Pull it out and down of the rod. Produce a uturn together with the cording as you direct within the best pulley on the correct side of the rod and it up. Go underneath the slides on the correct side together with the master carrier that is best.

Push the cording underneath the correct side of the grasp provider that is left and direct up it through the hole on the best side of this carrier. Tie a double-knot in the finish of the cording.

Work every one of the slack out of the curtain rail. Pull on the cording s O the excessive is hanging from your side that is left. Check the rod is operational re-hang its own curtains and the rod.

See related

To Re-Tile Your Countertop

Though timeless in their own elegant look, tile counters don’t last for ever. Whether your existing counter-top tile is merely out-of-date or broken and chipped, there’ll come a time that it’s going to need to be changed. Once your new tiles are selected as well as purchased, all that’s left is a small elbow-grease involving you as well as your new counter-top.

Break the tiles in the counter using a hammer a way. Use a chisel making them more easy to eliminate.

Brush the bits of tile with little broom and dust pan away.

Scrape a way smaller parts using a razorblade of trapped tile and mortar.

Vacuum the the rest of the dirt and particles using a vac up, or use the brush attachment of your home vacuum.

Arrange the tiles that are new on the area that is dry. Space them. This may help one to determine which tiles will require to be cut to to suit. Mark tiles that need to be re-sized having a pencil where they require to, to annotate reduce them using a saw, and altered.

Remove the tiles, and set them apart.

Spread a thin-set or mastic mortar on the entire area using a trowel. Distribute the mastic or mortar over one little region in a time to stop it from becoming dry before you adhere the tiles into it it in the event you are tiling a large-area.

Place the tiles onto the adhesive in the specified order or style. Space the tiles or measuring tape to keep the the exact distance between tiles constant.

Allow the tiles to sit undisturbed for 2 4 hrs in order that they dry in to location.

Fill in the spaces involving the tiles. Use a little trowel or float, and follow the manufacturer’s guidelines for certain kind of grout you you bought. Clean a way extra grout from your tiles using a clear, moist fabric. Allow the grout.

Buff the tiles having a gentle, dry fabric to remove the haze the grout recover the sparkle to the tiles and may have left left out.

See related

The best way to Apply Tin Kitchen Tiles

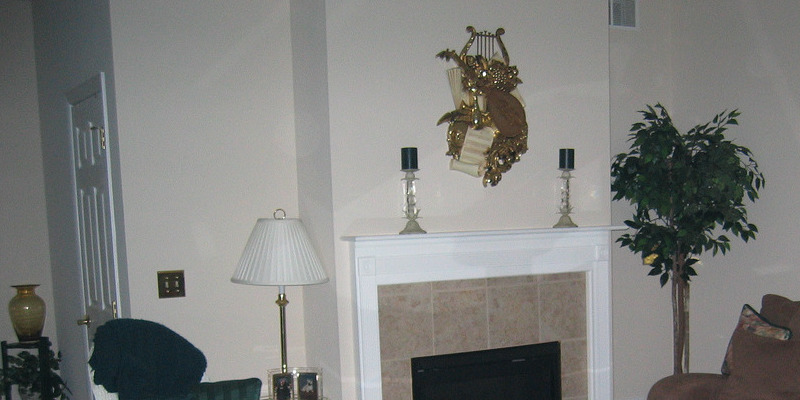
Aluminum tiles, usually called tin tiles, make an excellent alternative. Tin tiles are significantly more easy to install, cheaper and need less upkeep. Along with that, they don’t weigh as much, making them perfect for just about any location. These tiles provide the possibility to generate a custom-made ceiling or wall display in your house. You can also paint them to look like tiles. Provided that you learn the best way to use a hammer as well as a tape measure, you’ll have little trouble planning and installing small-sized tiles yourself.

Tap across the ceiling before you hear a thud that is dense. This this means that the place of a joist. Mark the area of the joist. Tap again 16-inches to both sides of the joist to locate another one. Continue this procedure before you’ve got marked all of the joists.

Mark level lines across the whole area utilizing a laser level. Secure bits of yarn between walls, securing them to the partitions with low-tack tape. Use the lines as a manual.

Measure the the length from your strings up to the joists. Nail a shim to the ceiling along with the joist to make most of the measurements if any joist is greater than another.

Nail sheets of plywood to the ceiling with all the joints perpendicular to the joists using 16d sinker nails. Leave 1/8 inch gap around all edges of every bit of plywood. Snap two chalk lines on the plywood sheets, around the ceiling, from opposing walls to mark the middle.

Clean the tin panels with de-natured alcohol and dry entirely having a cloth. The tiles with oil-centered paint or polyurethane that is obvious. This is essential to stop rust. Remove PVC protecting movie from pre-painted tiles.

Lay out the ceiling tiles on the flooring to get a basic thought of the way to fit them. Measure the width of the ceiling in both instructions and decide just how much area is left involving the edges of the wall as well as the tiles. Add 1-inch to permit overlap.

Cut the border panels to that particular width measurement utilizing tin snips. Install the border panels with 11/4inch wire nails near the fringe of of fringe of and the wall of the tile as achievable. Overlap the panels in the corners of the space by 1/2 inch. Where the tiles join together utilizing a little tack hammer tap down any large places.

Nail the panels that are complete, re creating the lay-out you created to the plywood starting in the guts of the space, on the ground. Follow all manufacturer’s strategies for for the dimensions nails to use and just how much overlap to allow involving the tiles. Seal seams by tapping having a hammer and holding ablock of wood over them.

Cornice to the partitions as well as the ceilings, centered along the joint between them. The first little bit of cornice should contact equally partitions that are opposing. Tape a scrap bit of cornice up to the wall that is adjacent with one conclusion touching the cornice that is installed. Place the tape diagonally using the fringe of of the tape touching the corner of the scrap piece and extending to the ceiling a-T a 4 5-diploma angle.

Scribe aline across the middle of the tape to transfer the account that is decorative to the tape. Remove the scrap in the wall and cut along that line. Test suit the scrap by butting it facing the cornice that is installed. Use the scrap piece as a template to reduce a little bit of cornice. Continue installing the cornice in this method till all partitions are accomplished.

See related

Copyright h o m e s t a y b e i j i n g 2 0 0 8 2024