How to Install a Carpet Yourself

Carpet installation is not as technically difficult as most homeowners think it is. With the right preparation, it can be a very easy and simple project. The biggest challenge that most people have lies in the size of carpet rolls that they have purchased, and in most cases, the amount of space they have to work with. This is why you should consider handyman Santa Ana in case you need professional help.

The guidelines for laying a carpet are pretty much the same, whether you are laying a plush carpet for your living room or a basement carpet. Other than custom carpets, most carpets are 12 feet wide. Even for a normal room that measures 12 x 12 feet, the rolls will be relatively heavy. In case your carpet must have a seam, make sure you hire an expert to handle the installation. You will get better results than if you tried to install it on your own.

Another instance where you would be better off hiring a professional is if you want to lay a carpet on the stairs. The reason here is mainly for safety and less on aesthetics. An amateur can do handyman Santa Ana CA on the stairs but fail to keep it tight on all the steps. As a result, it the stairs become dangerous because of how easy it will be to trip and fall.

Using a Carpet Pad

For this installation, you must have some adhesive or glue to keep the pad and the carpet glued on the floor. Other than that, you must also keep the carpet properly fixed to the floor around the perimeters. This will help you prevent unnecessary bumps and lumps once you finish laying the carpet.

You must first create a tack strip. The wooden strip should cover the entire perimeter of the space you want to carpet. Nail the strip to your subfloor and keep all the points at an angle to the wall. The points that will be sticking from the tack strip will hold the carpet in place once you have stretched it. Pay attention to the spacing of the tack strips. They are supposed to be set from your wall, a distance that’s the same as the thickness of your carpet.

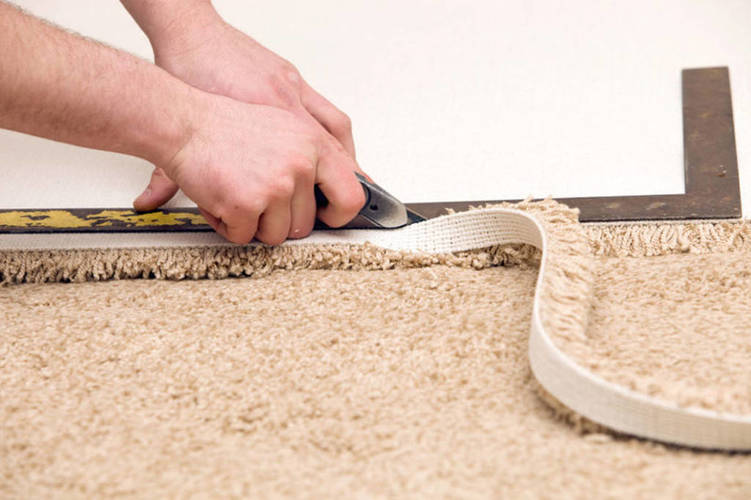
Set the carpet pad within the layout of the tack strip, and then affix it on the subfloor with staples. You can trim the pad with a small knife if needed. At the point where the duct tape meets the pieces, seal the joints.

Try and lay the carpet in the correct position. The less movement you have when laying out the carpet, the better the results that you will get. You might need a carpet kicker and stretcher to move the carpet above the tack strip spikes with ease. For a handyman Santa Ana expert, these are tools that are very easy to use, out of experience. For a beginner, you might have all the tools needed, but you may still struggle to use them as you should. You will also notice that during installation, professionals have the seams in areas that are not visible or on those that experience less traffic.

The best way to Wire an Outlet

Painting your walls a different colour can renew your house, or make it more more inviting to your potential buyer. Completing the wall colour transformation needs eliminating outlet addresses and even when they’re outdated, worn, stained and clash with all the wall colour, changing the shops. When installing a new outlet, particularly an outlet with six wires at the center of the circuit failing to produce a record of the way the wires connected to the first outlet can cause some confusion. As soon as you determine the outlet terminals as well as the wires, it is possible to wire virtually any outlet in your home.

Check the circuit-breakers in the breaker panel and ensure the breaker for the outlet is nevertheless in the “Off” place.

Hold a non-contact electrical tester close to the wires in the outlet box. If electricity is present in the outlet box the tester will sound an alarm and start an indicator light.

Look in the outlet box to determine the six wires. There are two wires, one that offers electricity to another that connects the outlet to a different outlet across the circuit and the outlet. There are two white wires that connect with still another outlet and to the outlet in the primary source. The two bare copper ground wires help avoid accidental electrical shock. While the other connects the outlet just, one floor connects to the outlet in the primary power supply.

Turn within the outlet to determine the terminals located on each individual side. One side and the other has copper-colored final screws or two black and two coloured terminal screws, respectively. One established of black or copper and silver-colored terminals could be called “Line” as well as the other defined as “Load.” The bottom of the outlet features a solitary green final screw called “Ground.” If the sets of terminals aren’t labeled, you don’t need certainly to worry about which particular side of the outlet you attach the wires.

Bend the ends of the wires in to tiny hooks with needle-nose pliers. The hooks to match the final screws on the outlet round.

Hook the black wire coming in the key breaker panel across the black or copper “Line” final. Use the terminal that is best on an outlet that is unmarked. Tighten the terminal screw to contain the the wire. Hook the remaining black wire round the black or copper “Load” terminal or the bottom terminal on an unmarked outlet. Tighten the terminal.

Wrap the white wire connecting from your principal breaker panel across the silver-colored “Line” final. Use the final that is best on the outlet on an outlet that is unmarked. Wrap the remaining white wire round the silver “Load” final or the bottom silver terminal when the outlet isn’t marked. Tighten both silver-colored final screws.

Hook the two bare copper floor wires round the ground terminal on the base of the outlet. Tighten this screw to finish the outlet wiring.

Install the outlet to the outlet box. Connect the outlet to the box together with the screws that was included with the outlet at both bottom and the top. Cover the outlet using a wall-plate and connect it using the screw that included the plate.

Flip the circuit-breaker to the “On” place in the breaker panel. Plug radio or a little equipment to the outlet. Turn on radio or the appliance to assure the outlet works.

See related

The best way to Clean the Pilot

When the pilot in your wall furnace doesn’t remain lit, your furnace won’t warmth. The wall furnace can be caused by a number of factors to not mild, including a fuel offer that is disconnected, a pilot orifice as well as a broken thermocouple. The pilot features a tiny opening in its conclusion that will become clogged with particles and dirt and dirty. Cleaning the pilot in your wall furnace save you and can get your furnace heating.

Shut off the electricity to the furnace at your primary breaker panel. The single-pole breaker operates the blower motor as part of your fuel furnace. Turn the wall furnace.

Turn off the fuel to your own wall furnace. The supply line has a cut-off valve to stop the fuel flow to the furnace and is close to the furnace. Rotate the valve handle to the “Off” place. Use a gas-meter important to turn off the fuel supply to your own house in the exterior meter in the event that you are unable to locate the cut-off valve.

Open the access panel to make it to the pilot as well as the fuel control valve. The entry panel is held shut by two or one screws and is positioned in the underside of the furnace.

Look on the fuel control valve for the fuel control knob. Push in on the knob and turn the control knob to the “Off” place.

Follow the fuel line in the control valve to to find the conclusion of the pilot. Wipe the end of the pilot with the emery cloth. While you’ve accessibility wipe the conclusion of the thermocouple alongside the pilot.

Unbend a paper clip to straighten it. Insert the conclusion of the paper-clip in to the opening at the conclusion of the pilot to eliminate any ash or particles which may clog it.

Turn the principal fuel provide again on to your own wall furnace. Turn on the wall furnace circuit-breaker.

Push in the gasoline get a grip on knob and rotate it to the “Pilot” place. Keep keeping the knob down while lighting the pilot having a fire-place match or by pressing the igniter button before the pilot lights. Slowly re-lease the fuel get a grip on knob.

Rotate the gas handle knob in your furnace to the “On” placement. Close your access panel and established the thermostat in your furnace to your own desired temperature.

See related

How to Properly Clean Nylon Flags in a Washing Machine

Flags dirty. Whether you’re flying an attractive backyard banner or the Stars and Stripes, most outside flags are constructed with sturdy and weather- . This artificial polymer material does not fade in the sunlight and dampness is survived by it properly, but immediate heat can make it melt. Nylon flags are generally machine washable, but treatment should be taken to avoid heat injury also to stop the colours from bleeding.

Pretreat any stains on the flag using a stain remover that doesn’t include bleach. Rub the remover to the stain and let it soak in or as, for five minutes.

Place the flag in the washer. Set the device to your cold water wash and rinse on a gentle or sensitive cycle. Hot-water or warm can cause the colours to bleed.

Following the washer fills with water, add a gentle laundry detergent. Close the lid and permit the washer cycle to to operate as regular.

Remove the flag in the machine. Lay it out flat on a towel or hang it on a line. Don’t machine dry the flag, as the nylon can be caused by the heat in the dryer.

See related

Copyright h o m e s t a y b e i j i n g 2 0 0 8 2024