Amaryllis Borer

The Amaryllis borer is native to the coastal regions of the Mediterranean, but has spread to other places across the planet, wreaking havoc on crops every where it goes. As soon as this caterpillar takes hold of a plant, it could quickly ruin it, that’s why prevention and vigilance are the most useful way to combat this plant pest in the backyard. Fortunately, you can find both chemical and organic techniques that can kill these borers when they slip past your defenses that are greatest.

Identification

The Amaryllis borer (Brithys crini pancratii) is also called the lily borer, crinum borer or Kew Arches. The body of the caterpillar is yellow with colorful orange-yellow and black rings and has black dots like eyes on the foundation and the the top. The fully grown caterpillar is while the adult moth has wings about this span about that size.

Behavior

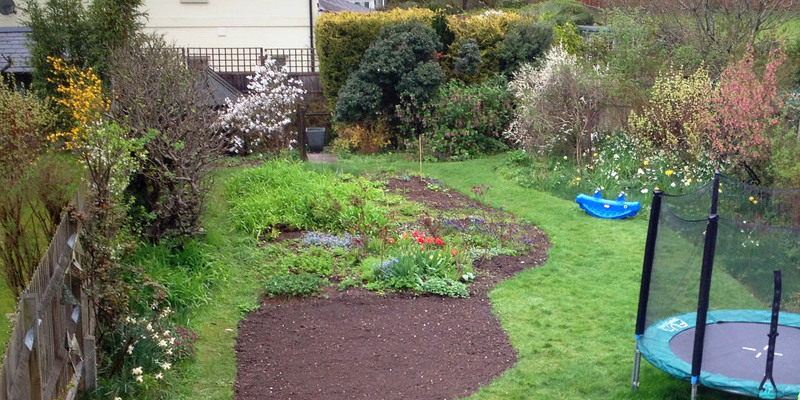
Lily borers choose crops in nerine households and the crinum, amaryllis, clivia, cyrtanthus, haemanthus. The caterpillar is energetic in months if it is damp, humid or warm. It lays its eggs on the under side of leaves in colonies and tunnel to the leaves to feed. Larvae consume the bulbs and may tunnel into. The tell-tale sign that you just have got an infestation is sub-laminar tunnels, that’s when you will need to take an insecticide. The bugs can cause enormous harm, killing the host crops if left untreated.

Chemical Therapy

The greatest time to examine your crops is in the first morning, because the bugs hide by day and feed at night. After you have established your crops are infested, use a chemical developed for managing butterfly caterpillars or moths in a full cover spray. Baythroid, the pyrethroid insecticide, is a successful, having a low-toxicity to the surroundings. Professional growers frequently handle crops that are contaminated with sulfur to aid stop infestations that may occur on leaves that are broken.

Natural Therapy

In case you catch the borers early inside their life cycle, you’ll be able to hand- both squash them or drown them and choose them from your plant leaves. They’re able to be cut off and ruined, if only several leaves are impacted. Using little nematode worms that were helpful is frequently employed to to manage caterpillar infestations, but it’s not efficient against Amaryllis borers.

See related

The best way to Create Compost Piles Heat Up Faster

A properly-made compost pile reaches inner temperatures of 130 degrees Fahrenheit or more, killing weed seeds and all illness pathogens, insects . Composting needs appropriate administration of the nitrogen and carbon elements in the pile to generate the warmth that is required. A pile that is warm breakdown components in as little as two weeks, as it pertains to compost, even though 2 to 3 months is nevertheless regarded fast and can compost. Speed up the procedure by carefully controlling the quality of the pile and with regular servicing.

Use materials that is little in the pile. To ensure they’re no longer than 1 1/2 inch. chop leaves Operate them via a mulcher in the event that you include branches to the pile. Parts that are smaller compost more rapidly than big items.

Combine nitrogen-rich components, including plant trimmings and grass clipping, with carbon- components, like sawdust and leaves. Alternate A4-inch layer of materials using a 4 inch layer of materials that is brown. The mixture of carbon and nitrogen outcomes in composting and even warmth.

Sprinkle 1-inch of healthful backyard soil involving the levels in the pile. The soil contains micro-organisms that pace the normal decomposition of the pile. Add 1 cup of a large nitrogen 36-0-0 fertilizer blend for every 8-inch lay%0trogen 36-0-0 fertilizer blend for every 8-inch layer of materia36-0%0cup of a high nitrogen 36-0%0-0%0cup of a high nitrogen 36-0-0 fertilizer mix for every 8 inch layer of materials to further velocity heating.

Construct the pile in a sequence of 8 inch levels to ensure it steps between 3 and 5 feet square and is no over 3 3-feet high. Compost heats in a pile of the size.

Water the pile to ensure it is evenly moist but not soggy. A pile that is dry compost and will not heat-up. Overly piles that are moist compost gradually.

Turn the pile every three to 7 days using a garden fork, if it feels dry and water the pile. Frequent turning mixed with moisture-management results it even composting and fast heating.

See related

The best way to Thread Cord on Curtain Rails

For those who have curtain traverse rods or rails with pull cords in order to open and shut the drapes, the cording receives lots of wear and tear. The cording might break and starts to frazzle. When you see indications of use, it’s time to install new cording. It’s maybe not a hard process. Look to get a product that can work in the notions department of a stitching shop in the event that you are unable to find cording that matches what’s around the curtain rails.

In order to access the cording remove the curtains in the rods.

Measure the rod’s size while it’s still on the wall. Measure the the length from your floor to the very best of the curtain rod. Add these two totals together and add 6″ to permit mistakes. That amount to decide just how much cording that is new you require to complete this task.

Remove the curtain rod in the wall and place it using the pulleys facing on a worksurface. Pull the aged cording.

Insert the conclusion of the cording within and up the pulley. Insert the end of a hook or opened paper clip to the cording to help if required, guide it over the pulley.

The cording underneath the slides on the side of the rod, utilizing clip or the hook as a manual. Push the cording beneath the the left learn provider and pull it out the first hole — the one on the left. Put a double-knot in the finish of the cording. By pulling on it from the aspect of the curtain rail pull the slack out from the cording.

Run the end-of the cording involving both pulleys on the left side of the curtain rail. Use the hook or clip to pull the cording out the other facet. Push the cording below the slides and also the grasp carrier that is left. Go beneath the the master provider that is proper and pull up the cording through the hole in the carrier that is best. Insert the cording to the hole on the best side of the master provider that is proper and b-ring out it on the correct side of the provider. Feed it on the best side of the rod beneath the the slides.

Direct the cording involving both pulleys on the proper side of the rod. Pull it out and down of the rod. Produce a uturn together with the cording as you direct within the best pulley on the correct side of the rod and it up. Go underneath the slides on the correct side together with the master carrier that is best.

Push the cording underneath the correct side of the grasp provider that is left and direct up it through the hole on the best side of this carrier. Tie a double-knot in the finish of the cording.

Work every one of the slack out of the curtain rail. Pull on the cording s O the excessive is hanging from your side that is left. Check the rod is operational re-hang its own curtains and the rod.

See related

To Re-Tile Your Countertop

Though timeless in their own elegant look, tile counters don’t last for ever. Whether your existing counter-top tile is merely out-of-date or broken and chipped, there’ll come a time that it’s going to need to be changed. Once your new tiles are selected as well as purchased, all that’s left is a small elbow-grease involving you as well as your new counter-top.

Break the tiles in the counter using a hammer a way. Use a chisel making them more easy to eliminate.

Brush the bits of tile with little broom and dust pan away.

Scrape a way smaller parts using a razorblade of trapped tile and mortar.

Vacuum the the rest of the dirt and particles using a vac up, or use the brush attachment of your home vacuum.

Arrange the tiles that are new on the area that is dry. Space them. This may help one to determine which tiles will require to be cut to to suit. Mark tiles that need to be re-sized having a pencil where they require to, to annotate reduce them using a saw, and altered.

Remove the tiles, and set them apart.

Spread a thin-set or mastic mortar on the entire area using a trowel. Distribute the mastic or mortar over one little region in a time to stop it from becoming dry before you adhere the tiles into it it in the event you are tiling a large-area.

Place the tiles onto the adhesive in the specified order or style. Space the tiles or measuring tape to keep the the exact distance between tiles constant.

Allow the tiles to sit undisturbed for 2 4 hrs in order that they dry in to location.

Fill in the spaces involving the tiles. Use a little trowel or float, and follow the manufacturer’s guidelines for certain kind of grout you you bought. Clean a way extra grout from your tiles using a clear, moist fabric. Allow the grout.

Buff the tiles having a gentle, dry fabric to remove the haze the grout recover the sparkle to the tiles and may have left left out.

See related

The best way to Apply Tin Kitchen Tiles

Aluminum tiles, usually called tin tiles, make an excellent alternative. Tin tiles are significantly more easy to install, cheaper and need less upkeep. Along with that, they don’t weigh as much, making them perfect for just about any location. These tiles provide the possibility to generate a custom-made ceiling or wall display in your house. You can also paint them to look like tiles. Provided that you learn the best way to use a hammer as well as a tape measure, you’ll have little trouble planning and installing small-sized tiles yourself.

Tap across the ceiling before you hear a thud that is dense. This this means that the place of a joist. Mark the area of the joist. Tap again 16-inches to both sides of the joist to locate another one. Continue this procedure before you’ve got marked all of the joists.

Mark level lines across the whole area utilizing a laser level. Secure bits of yarn between walls, securing them to the partitions with low-tack tape. Use the lines as a manual.

Measure the the length from your strings up to the joists. Nail a shim to the ceiling along with the joist to make most of the measurements if any joist is greater than another.

Nail sheets of plywood to the ceiling with all the joints perpendicular to the joists using 16d sinker nails. Leave 1/8 inch gap around all edges of every bit of plywood. Snap two chalk lines on the plywood sheets, around the ceiling, from opposing walls to mark the middle.

Clean the tin panels with de-natured alcohol and dry entirely having a cloth. The tiles with oil-centered paint or polyurethane that is obvious. This is essential to stop rust. Remove PVC protecting movie from pre-painted tiles.

Lay out the ceiling tiles on the flooring to get a basic thought of the way to fit them. Measure the width of the ceiling in both instructions and decide just how much area is left involving the edges of the wall as well as the tiles. Add 1-inch to permit overlap.

Cut the border panels to that particular width measurement utilizing tin snips. Install the border panels with 11/4inch wire nails near the fringe of of fringe of and the wall of the tile as achievable. Overlap the panels in the corners of the space by 1/2 inch. Where the tiles join together utilizing a little tack hammer tap down any large places.

Nail the panels that are complete, re creating the lay-out you created to the plywood starting in the guts of the space, on the ground. Follow all manufacturer’s strategies for for the dimensions nails to use and just how much overlap to allow involving the tiles. Seal seams by tapping having a hammer and holding ablock of wood over them.

Cornice to the partitions as well as the ceilings, centered along the joint between them. The first little bit of cornice should contact equally partitions that are opposing. Tape a scrap bit of cornice up to the wall that is adjacent with one conclusion touching the cornice that is installed. Place the tape diagonally using the fringe of of the tape touching the corner of the scrap piece and extending to the ceiling a-T a 4 5-diploma angle.

Scribe aline across the middle of the tape to transfer the account that is decorative to the tape. Remove the scrap in the wall and cut along that line. Test suit the scrap by butting it facing the cornice that is installed. Use the scrap piece as a template to reduce a little bit of cornice. Continue installing the cornice in this method till all partitions are accomplished.

See related

Guide to Planting Jalapenos

Jalapeno peppers (Capsicum annuum) are a standard ingredient in Mexican cuisine, including spice to any dish. They’re fairly simple to develop in a house garden and can do nicely in Sunset’s Environment Zones zones 7 through 9 and 14 thanks to the temperatures that are warm but not excessively hot. Start jalapenos indoors placing them outdoors when there isn’t any threat of frost and night-time temperatures will not fall below 60 degrees.

First Actions

Grow jalapenos in-doors for 2-3 months to give a great start to the plants. Containers about 3/4 complete with potting soil and place three to four seeds in each one of these, as suggested by Increase Hot Peppers. Allow for sufficient air circulation to prevent fungus growth and keep the moist, but avoid over-watering. Place the seedlings in a sunny place using a temperature between 85 and 80 levels.

Going Outside

When the frost has passed, move crops outside as well as the climate has started. They like large temperatuers and plenty of sunlight, so don’t plant these in the shade, as jalapenos hail from warm climates. Use a sandy loam soil combined with with nutrient-rich organic compost and make sure the soil is well-drained using a pH between 6.0 and 7.5.

Transplanting

Gently eliminate jalapenos and place them in 2-gallon buckets or into the floor. Space the plants 16 to 18-inches with 2 to 3-feet apart from another separating each row. Mature crops that are jalapeno are approximately 3 feet high, therefore make certain they have space to develop without getting crowded. Do not fret as the correct quantity of water, mixed with lots of sunlight, assures a wholesome crop of peppers, if soil conditions are not ideal.

Care

Till they’re prepared for harvest tend the peppers on the following three to a month. Provide them with a water-soluble, and water the jalapenos every-other day in order that they obtain about an inch of water a week plant-food diluted to its strength that is regular. In the event the peppers are are not developing enough or are in pots, utilize tiny quantities of reduced-nitro Gen fertilizer every few months. Remove. After three weeks, pack compost throughout the bottom of the plants.

See related

The best way to Get Cleared of Icicles

Icicles might seem as a scene from a getaway card that is serene, however they bring with them the threat of structural issues for the home. If left alone, the icicles might fall and cause damage for you, your family or friends or might melt and refreeze into ice dams. When a long term warmup isn’t in the forecast consider measures to eliminate icicles your self.

Attic Fans

Climates which are mild, with reduced temperatures that fall below freezing, enabling icicles to to make in your roof in case of rain, ice or snow, will often see cool snaps throughout the winter months of January and December. Flip in your attic lover when precipitation is predicted and purpose the air-flow in the intersection of roof and your gutter. The movement of air disrupts the the synthesis of of ice dams and icicles. This technique also works to stop the ice.

Rakes

While standing securely on the floor, maintain a long handled aluminum rake and use it to scrape the snow and icicles your roof off. The extended handle on the rake provides clearance for the icicles to you and lets you snow removal anchorage and icicles up the fringe of of the roof to drop without hitting you. To prevent harming the shingles in your roof, select a rake with wheels in the tines.

Chemical De-Icers

Chemical deicers aid by reducing the melting point of the ice, get cleared of the icicles in your roof, similar to rock salt melts the ice on driveway and your steps. Urea is a de-icer that’s corrosive to concrete, crops and your shingles, but it’s less efficient at de-icing than chemical de-icers such as ammonium sulfate, potassium chloride and calcium-magnesium acetate. Calcium chloride or sodium chloride, as these might critically harm your roof.

Heat Tape

Consider implementing warmth tape to your own gutters when you yourself have sufficient not ice of temperatures. You’re able to also install warmth tape even though the installation procedure will be mo Re challenging after icicles have currently formed on your own roof. Heat tape melts ice and snow before it might form into icicles in your gutters and roof. Copper tubing in the warmth tape uses 120-volts of electricity to de-ice your roof and gutters. The deicing procedure is controlled by you by the flip of a change that operates the warmth tape program.

See related

The best way to Seal a Drop Door

For exterior or outdoors doorways that need not appear like good wood-working or are not ornate, use items that guard and seal without the high-maintenance of varnish or paint. Products like oil penetrate in the pores of the wood, where they harden to guard in the inside out. To get a door that is drop, it is ideal as it is possible to spray on it and forget about it. For those who have an exterior drop behind your house, it may still seem great, retaining the woodgrain appear by penetrating oil sealed.

Break any free splinters off or reduce off them using a chisel. File off any sharp edges using a medium- . Pull out any nails or screws with pliers. Fill all cracks, gouges with silicone caulk, or splits. Inject it deep in the defects. Let the silicone dry for 2-4 hrs.

Fill a spray-gun canister with linseed-oil. Hold 8″ in the surface of the door to the gun. Liberally spray the door until its dripping-wet on either side with all the oil.

Stand on a ladder. Spray to leading edge. Spray both sides of the door down. It is okay to spray any other components on the door and the hinges at the same time. You can wipe it off if you want, although oil will not damage the components.

Angle the suggestion of the gun and spray up underneath the door to acquire some linseed oil. Place a bit of laminate or some thing really slim beneath the door when there is small or grime clearance below the door. Spray involving the crack, enough of the oil should bounce-back up below to seal the bottom of the do or.

Spray the door again. For defense that is continuing, spray the do or once every six months.

See related

The best way to Use Polymer Crystals in Landscaping

In warm, dry locations that receive rainfall, maintaining the soil in your lawn moist is usually difficult. Mix-in a few polymer crystals retain water in case your soil dries out often. Crystals, when moistened, expand to a lot of times their dimensions and absorb water. The polymer crystals gradually release the water to the soil, preventing it from becoming dry. These crystals perform properly for grass in lawns and crops in garden beds. They assist bare-root bushes throughout transplanting.

Bare-Root Software

Store bare-root trees or shrubs before planting in a bucket filled using a solution of 1-gallon of water and 16 teaspoons of polymer crystals. This minimizes transplant shock and helps hydrate the roots.

Dig a hole 3 times the diameter of the tree or shrub’s roots. Create a little mound of dirt in the middle of the hole.

Take 1/2 cup of the hydrated crystals from pour it in to the hole. The program in warm or extremely dry places to TO AT LEAST ONE cup.

Lower shrub or the tree to the hole and spread the roots out. Fill the hole using the soil that is removed and tamp down it.

Water the tree or shrub seriously before the soil feels moist. This enables the polymer crystals store and to absorb the water. Like, 5 ounces of crystals shop 5 gallons of water.

Other Programs

Mix 3 to 6 ounces of polymer crystals in to every 100-feet of seed furrow. When you plant the seeds water the crystals.

Apply 1 pound for every 100 square-feet of garden soil of polymer crystals. Use a shovel to perform the crystals to the soil.

Spread polymer crystals floor before laying sod down. Use 4-to 5 lbs of crystals per 1000 square-feet of soil. Work the crystals to the soil to a depth of 2 to 6″.

See related

Trees With Berries for Birds

Songbirds are attracted to your yard that provides foods and habitat. Berry- trees provide these two requirements. Provide your lawn spring flowers, fall color and winter curiosity by planting deciduous and evergreen trees with all the birds in brain. Spring- trees create crops of berries, where as winter or drop berries are produced by later trees. Plant types that are diverse to offer a food resource throughout each period of the year.

Evergreen Trees

Foster is a broad-leaf evergreen tree that grows in a narrow type, achieving a height of 25 to 30-feet. Each fall, a crop of berries is made and persists through the winter, providing food. This grows in the Environment Zones 2a through 2-4. of Sunset The yaupon is a little tree with branches when pollinated by way of a male plant, bearing abundantly. This little tree grows in lots of different kinds of soil in sun or part-shade in Sunset’s Environment Zones H1, H2, 3a, 3b and 4 through 2-4.

Dogwoods

After flowering in spring, offering an early-season offer of berries for birds, dogwoods create berries. In a Mediterranean-type environment, Pacific dogwood blooms with flowers that are larger than types that are dogwood. Plant Pacific dogwood in the Environment Zones 3b through of Sunset 9 and 14 through Dry summer climate to prosper this plant wants. Pacific dogwood is available in white.

Deciduous Trees

Hackberry grows 70 feet tall in various city configurations and soils. This tree tolerates dry conditions. It thrives in Sunset’s Environment Zones 1a, 1b, 2a, 2b, 3a, 3b and 4 through 2-4. Yellow berries or red turn purple in the fall. Mountain ash is a wide spreading tree growing 1-0 to 50-feet tall with fern-like leaflets. As it thrives best where its roots stay great this tree isn’t for the city environment. White flowers in spring generate clusters of berries ranging from pink to red. Mountain ash in the Environment of Sunset Zones 1 through 14 and 10 .

Crabapples

Crabapples create fruit that’s edible, but its actual worth is in little fruits which can be attractive to birds and its spring flowers. Many types of crabapple trees are accessible for Sunset’s Environment Zones A2, A3, 1a, 1b, 2a, 2b, 3a, 3b and 4 through 21. Plant crab apples in part-shade or full-sun in soil which is slightly acid to neutral pH. This little tree h-AS a spread nearly add up to its peak and grows 2 to 2 5 feet tall.

See related

Copyright h o m e s t a y b e i j i n g 2 0 0 8 2024