Home Design: What Is Your Story?

In my home, we are completely enjoying the new season of Parenthood on NBC. Watching all the interactions of parents, grandparents, siblings, and cousins reminds us of their own family and all of the joy and angst that households bring.

However I have to admit, once again, that among those aspects of the series I truly enjoy is the set design. It is the way every home tells us who these individuals are. There’s Zeek’s and Camille’s hippie-chic style; Adam’s and Kristina’s upgraded traditionalism; Julia’s and Joel’s jettisoning of the past for the brand new, and Crosby’s bachelorhood.

The designers have done a remarkable job portraying the cast — without even viewing actors in these settings we know a whole lot about the characters they will portray.

So how can we get our houses to tell our story? How can people learn about us even with met us? Let us have a look.

More: ‘Pan-Am’ Inspires Flight Back to the ’60s
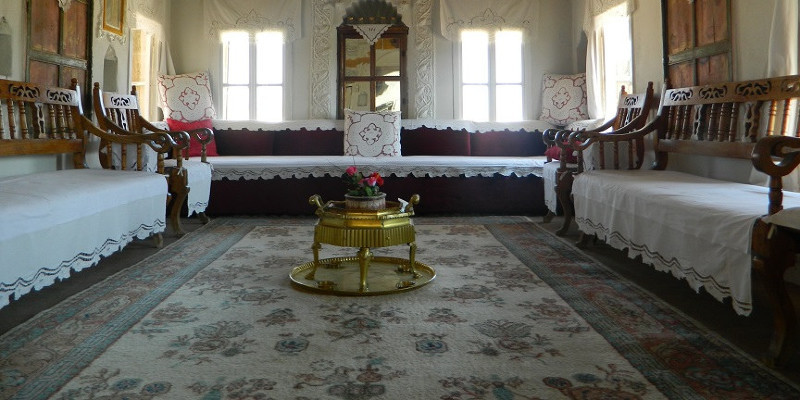
Bosworth Hoedemaker

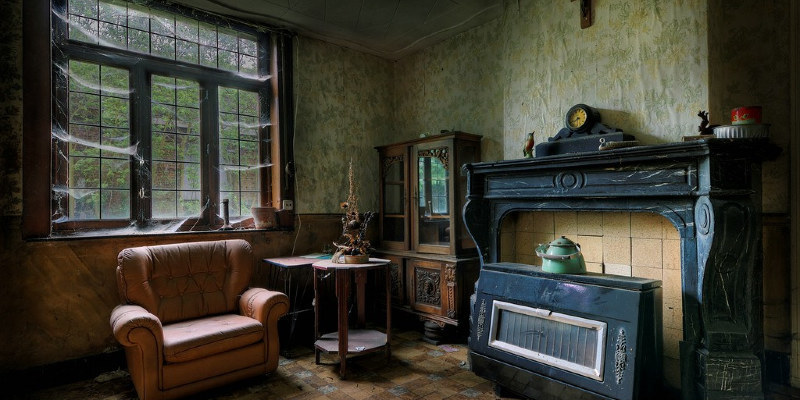
Zeek and Camille’s house isn’t quite as “high style” as it will have the identical feeling of a life well lived with its assortment of meaningful objects.

Tomar Lampert Associates

Nor is Zeek’s and Camille’s house as pastoral as this (although it does seem that it might have been in an earlier time). In fact, we get the feeling that Zeek and Camille weren’t any strangers to Haight Ashbury.

Felhandler/ Steeneken Architects

Zeek and Camille would be comfortable in this kitchen. Cheerful, colorful, bright and eclectic, this kitchen doesn’t take itself overly seriously.

Vintage Renewal

Zeek’s and Camille’s oldest daughter, Sarah, has moved back in with her parents after a stormy marriage. Evidence that the apple doesn’t fall far from the tree, Sarah is certainly comfortable in the comfortable surroundings of her childhood home.

Dorothy Howard AIA, Architect

Adam’s and Kristina’s upgraded Craftsman house tells us that this is a few as grounded from the past as they are forward-looking. A thick, solid wood entrance door with substantial hardware tells us these people want things which are grounded, while the prosperity of wide and handsome white trimming tells us they’re certainly living in the 21st century.

Goforth Gill Architects

Though Adam’s and Kristina’s home is older. It certainly has the upgraded kitchen with the major island that’s now the middle of family life. In this house the past and future blend together such as the stainless steel mixes together using all the traditionally styled wood cabinetry.

WA Design Architects

As befits their relationship (Julia is your earner, and Joel the stay-at-home parent), Julia’s and Joel’s house is all about being fresh and in the cutting edge. No traditional arrangement for those two, there’s nothing holding them to the past, and their eyes are firmly looking forward.

WA Design Architects

It doesn’t mean Julia and Joel are cool and aloof just because everything in their own home is fresh, shiny and contemporary. Such as the generous amount of wood here, both of these are, at their core, warm and intriguing people.

DM Designs

Cosby the bachelor is that one kid who never seems to develop. He lives on a houseboat if we meet with him.

Celia James

The antithesis of the older brother Adam, Crosby is a dreamer content, for the most part, to gaze at the stars.

Next: 13 ways to express your own personality

Bud Dietrich, AIA

Consider the front of your home, the face which you see from the street. If that warm and inviting appearance you desire isn’t there, you can change the roof pitch, swap the aluminum for plaster and then put in a new canopy over the door.

Richard Manion Architecture Inc..

Perhaps you wish to convey a more formal and elegant persona, as the white color, symmetry and Chinese Chippendale does here.

Christopher Templeton

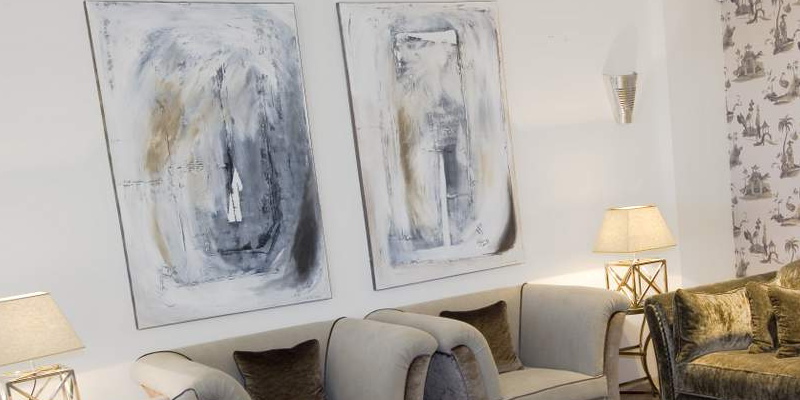
Utilize a color palette which identifies and celebrates each portion of your house to convey your love of detail and craft.

Bosworth Hoedemaker

Collections also help convey who we are. Consider displaying a set of classic maps of places we’ve traveled to.

James Cleary Architecture

Perhaps it’s an assortment of artifacts, such as pottery. All the better if they are things you’ve made.

So ask yourself regarding your precious stuff. Where do you keep it? How could you display it? What does it convey about you?

Bud Dietrich, AIA

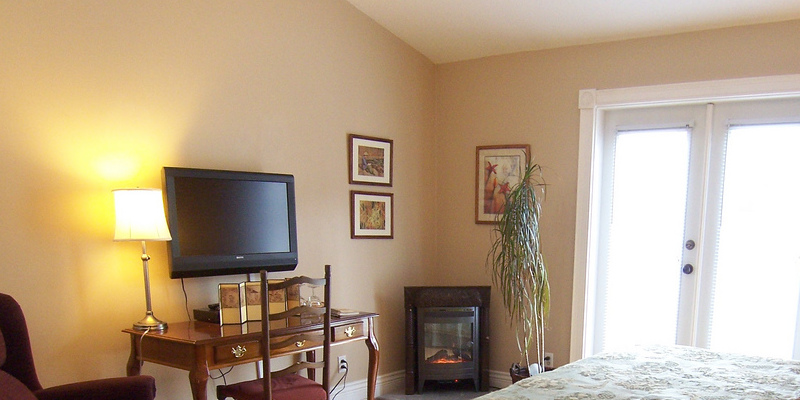
Even things in your toilet can tell your story. Where’s your engraving from? Was the plant stand an inheritance or flea market find? Is the clock in your bathroom an effort to overcome chronic tardiness?

Envision living

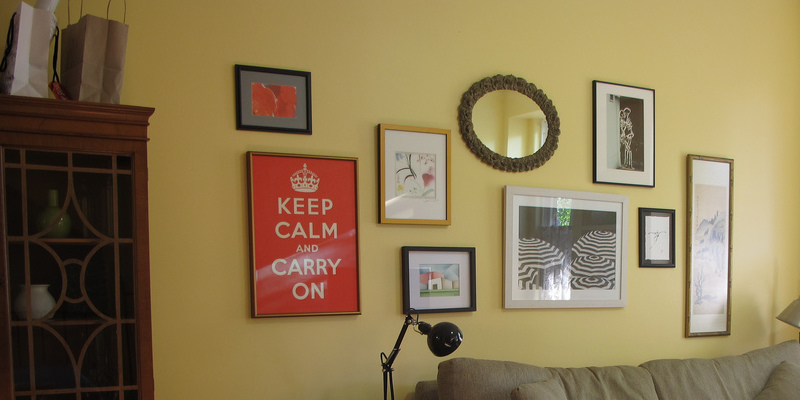
You can tell your story using photography. I can be large and in a position of prominence and of a cherished family member or two. The visitor has to ask, “Who are these people, and what is your relationship to them?”

decordemon

A wall size replica of a favourite photograph that tells us a bit of the story of you and your family.

Thrifty Decor Chick

Smaller framed photos reminds us of the people who have dwelt here.

Look around your home. Whose pictures are on display? How could you display them to convey something about yourself and your loved ones?

Ward-Young Architecture & Planning – Truckee, CA

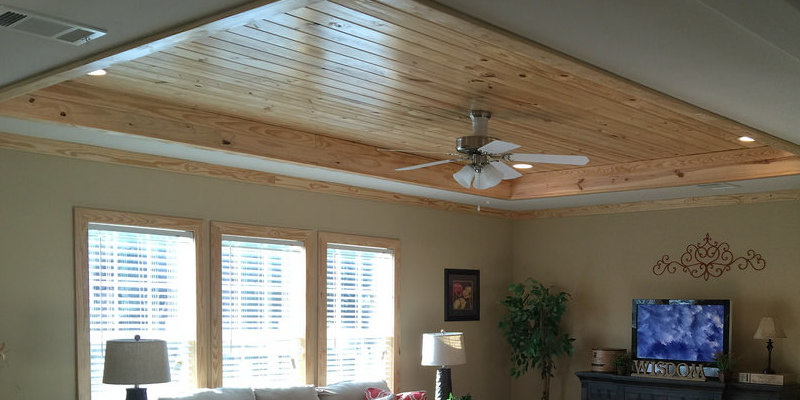
You can personalize a room using a bright, daring and favorite color. Remember an all-beige world wouldn’t be compelling.

Do you have a room painted your favourite color? Do not be concerned about resale. A paint color can always be changed. So do what you would like.

Canyon Design Build

Do not hesitate to use bright, bold colors and appliance fashions that convey your fun side.

Jill Seidner Interior Design

Give a wall which now is a shopping list and tomorrow a few scribbles. Do not hesitate to just throw things up there to express who you are and what’s on your mind.

Momoko Morton

A chalkboard, bright colors and personalized objects infuse a room with the story of the people who inhabit it.

More: Locate Your Design Mode

‘Pan-Am’ Inspires Flight Back to the ’60s

True-Blood: What should Sookie Just Moved Off?

Browse 200,000+ house photos by styleliving room and metro region

See related

Houzz Tour: Modern Shingle Style in Utah

This home tucked in the hills of Northern Utah was created in 1995 to balance the husband’s love of contemporary style and the wife’s love for much more of a cottage look. Salt Lake City architect Warren Lloyd of Lloyd Architects utilized cedar shingles and aluminum roofing to strike a balance and give the exterior a warm and organic design that will blend with its surroundings. About a decade later, the clients called on him and interior designer Susan Taggart to redesign the house, a project which included a gorgeous brand new kitchen and living space. “The trick was to incorporate modern elements in warmer and more comfortable colors and fabrics,” Taggart says.

Lloyd Architects

The house in Logan, Utah is perched on a hillside with views of rolling hills, a profound valley, and thick scrub oak forests. Its dramatic sloping roofline echoes the curves of this hillside. Because of this roofline, most of the ceilings in the house are sloped, creating a massive variety in ceiling height throughout the house. “The sense of spatial compression is a really powerful tool,” says Lloyd.

Lloyd Architects

“We thought of this house as connected pavilions,” says Lloyd. “There are two bungalow-sized forms which are pulled apart, with an arced living space connecting them.” Each bungalow is about 26′ x 40′. Together they hold the house’s five bedrooms, bathrooms and common areas.

Lloyd Architects

Outdoor living areas flow easily from the interior the house. There’s a clear view to the outside throughout — when entering the home, the outside terraces on the opposite side of the house are visible.

Lloyd Architects

Because the house was built on a steep incline, Lloyd and his team used terracing to make walls and garden spaces. This outdoor terrace is paved with concrete in a stamped cobblestone pattern.

Lloyd Architects

When Lloyd first built this house, the clients requested he put a laundry room next to the kitchen, and he put one in which this little family room is currently. Through time, the owner realized her family members and friends loved to collect in the kitchen, and the laundry room was stifling that space. When they did the remodel, Lloyd moved the laundry room to another area.

Lloyd and Taggart utilized quite a few special ceiling treatments, such as the woven plywood with a cherrywood finish above the family room in this shot. Split-face Travertine tile has been implemented to the wall behind the TV, contrasting the polished appearance of the plywood ceiling treatment and the cherry-stained bamboo flooring.

Chair: Flexform
Coffee tables: Zanotta Ambo tables

The kitchen became much more contemporary, as the wife’s tastes had changed considerably since the house was brand new. Stainless steel appliances, vivid colors, and bold lighting all create a contemporary look in warm hues.

The actual jaw-dropper is the custom made dining table, created by a local company called 3-Form. The base is stainless steel, and the shirt is made from pressed glass.

Countertops: Lemon Grass granite
Fridge: Sub-Zero

Island: Straight grain mahogany with stainless steel banding
Backsplash:
Walker Zanger

Lloyd Architects

The kitchen cabinetry is straight-grain mahogany, with some cabinet doors and doors in back-painted glass. The pure orange tint in the mahogany contrasts perfectly with the kitchen’s lime green accents and dark cherry hardwood flooring.

Range: Wolf
Pendants: Tobias Grau Sea pendant
Chairs: Montis Spica Chair

Interior designer Susan Taggart chose comfortable furnishings with modern lines. Engineered wood, textiles, and colors balance the appearance. “Often people think that contemporary is cold and uncomfortable, but it does not need to be the case in any respect,” says Taggart.

Lighting: Flos Fuscia pendants

The tilted ceiling in the living room is a great illustration of how the sloped roof transforms the sense of a space. The cast concrete fireplace reaches to the Douglas fir rafters, making a gorgeous intersection of contrasting materials.

Interior colour: Benjamin Moore Timothy Straw

While the traces of this house make for a daring design, Lloyd and Taggart chose a comparatively simple palette of materials, colors and products. Lighting was kept understated to prevent from disrupting the flow of the space. Sconces, recessed lighting, and a few pendants dominate the lighting scheme.

The ceiling screen in the master bedroom is a customized piece from local artisans, faux finished with silver foliage. Light from the outside goes through the piece to light the master bedroom. “It almost resembles a Turkish tent,” says Lloyd.

Bed framework: B&B Italia
Bedding: Bella Notte custom bedding

The glass tiles in the master bath were carefully selected in the exact same sage green which echoes throughout the house, and Taggart installed sconces along the sides of the mirrors instead of overhead lighting to get a more flattering glow. More of the eco-resin out of 3-Form could be viewed here in a few of the organically inspired patterns.

Flooring: Walker Zanger Porcelain tile
Wall tile: Walker Zanger 1×1 glass mosaic tile
Cabinets: Green Onyx
Sconces: Leucos Diana sconces

Lloyd Architects

The extremely low ceiling on the upper-level bridge is another illustration of the drama created by the house’s sloping roofline. The custom made railings are made from steel and a structured bamboo eco-resin panel out of 3-Form.

More Houzz Tours:
A Modern Romance in Ontario
Eclectic and Colorful in Colorado
Rustic and Traditional in South Carolina

See related

What Does Your Pillows Say About You?

Your cushions can say a great deal about your character, your design style, and the way you reside in your home. It’s possible to take a couch of the same style and put two distinct sets of cushions on it to create a very different look. Some people would rather have a clean and tailored look and a few favor a casual and dwelt in feel. What do your cushions say about your style style? Keep Reading to find out:

Beth Dotolo, ASID, RID, NCIDQ

If you are a Modernist: You use bold patterns and colors that come together in a tidy and well-paired collection. The cushions with this contemporary couch revealed soften the space, but the patterns also bring a structured and geometric contrast against the delicate nature of the cushions themselves.

Dillard Pierce Design Associates

If you are a Traditionalist: Your cushions match your couch fabrics and coordinate in an alternating pattern. Typically, whether on a couch or bed, the cushions are organized in a totally symmetrical design. As you can see on the couch in this traditional space, the cushions alternate one following the other in a succinct pattern.

Jennifer Brouwer (Jennifer Brouwer Design Inc)

If you are a Formal Transitionalist: Your cushions are perfectly coordinating using a more contemporary flair in the designs and designs. The living room shown here has a strategic design of cushions, requiring some thought and planning, that led to a gorgeous collection of cushions that suits the space beautifully.

Niki Papadopoulos

If you are a Casual Transitionalist: You also have flawlessly coordinating cushions patterns. Compared to the formalist, the casual transitionalist has a more relaxed equilibrium.

This room, as an example, has one asymmetrical cushion that helps to create a more casual style. You can even observe the “karate chop” styling, where you “chop” the tops of the cushions with your hands to get a more lived-in look.

Restyled Home

If you are a Romantic: Your cushions have a softer and more textural border. The cushions on this couch would be the epitome of romantic, using their delicate flowing fabrics and unmatched sizes.

Kristen Rivoli Interior Design

If you are Bohemian: You have a more casual and comfortable approach. The cushions selected for the couch over express a relaxed style with an ideal mix of earthy designs and sizes.

decordemon

If you are Eclectic: there’s likely a varying mix in both layouts, colors, and sizes in an eclectic area. An eclectic style has a more collected look that gives the look of a in-house house owner.

Amoroso Design

If you are a Minimalist: Your cushions are more functional. It is normal for minimalists to sum up their pillow collection using seat-back cushions and bed pillows.

Here, a bolster cushion and seat-back cushions are the only pillows in the room. And they fit the couch cloth, creating a clean and tailored look.

Beth Dotolo, ASID, RID, NCIDQ

Your cushions will say more than 1 thing about you personally and your styles can be mixed. After all, who would like to be put into a style box?

This formal and traditional pillow design was made a little more eclectic with the mixing of patterns and also the accession of the much less traditional skull layout.

The great thing about cushion collections is that you are able to express your style — and also alter it effortlessly. In my mind, cushions are the house’s greatest accessory.

More:
How to Layer Patterns Right
Where and How to Toss the Throw Pillows
9 Tips for a Well-Dressed Bed

See related

The best way to Adhere a Ceiling Vent

As it addresses the duct ceiling vents usually hook up to the joists over the dry wall ceiling to add balance. When your joists are too much from where you require to spot your ceiling vent, the vent can be attached by you right to the not in the dry wall using dry wall anchors. Without anchors, the drywall is likely to crumble without forming a a good seal round the screw, when you screw into it.

Lay the back of the vent on the ceiling, since the the duct that was open. Mark the holes in every single corner or on each side using a pencil. Make sure that the vent is big enough the marks should be-at least 1/2 inch from the duct. Remove the cover.

Drill a hole to the ceiling dry wall at every mark. The drill bit needs to be smaller in relation to the drywall anchors’ diameter, producing a a safe and a good fit. Drill straight at an angle, maybe not into the dry wall ceiling.

Place the cover on the hole that is duct aligning the holes. Push a dry wall anchor into each hole. The anchors are ribbed, therefore it might take some pressure to get all of them the way in. Faucet them gently with a rubber mallet if required. Do not use a normal hammer, which could split the plastic.

Drive the screws to the anchors using a screwdriver. Most dry wall anchor sets come with screws developed to to suit each anchor. If not, be sure to buy the same dimensions screw to guarantee a a good match and anchor. If feasible, have a buddy assist you support the the vent in location while the screws are added by you. Tighten each screw contrary to the vent. As you tighten the screws, making a protected maintain, then dry wall anchors increase within the dry wall.

See related

The best way to Install a Fresh Dishwasher Without Garbage Disposal

Installing a dishwasher that is new doesn’t need a rubbish disposal and also this appliance may be by-passed with piping attachments that are certain. However, citizens should contain an air-gap inside the dishwasher installation so that local laws are agreed with by the appliance. Specific consideration to connections, water-supply line, and the drain will culminate in a successful installation.

Turn your family water-supply in the primary valve off. This valve is usually located outside in a protected location, like a patio, or in the house in garage or the basement.

Turn off the circuit-breaker in the main panel that supplies energy to the dishwasher region. Verify the power is off by screening the panel using a non-contact circuit tester system.

Locate piping and wiring access holes in the cabinetry that surrounds the dishwasher area that is potential. There ought to be at least one entry hole involving the dishwasher area as well as the drain primary piping. This entry hole is generally positioned to the ground close to the rear of the dishwasher opening close. Drill an entry hole using hole-saw and a power drill, if required.

Detach the face plate at the end of the dishwasher using a screwdriver to gain access to the the bond factors. Each dishwasher product might need flathead or a particular screw-driver kind, like a Philips. The person washer product guide to verify the screw-driver that is required.

Position the dishwasher near its opening that is meant, however don’t drive it in to place however. Allow it to stay outside the cupboard for link level entry. Pull the drain hose in the base of the dishwasher and stretch back it toward a corner of the opening.

Drop an airgap to the hole residing on the most effective corner of the sink and through the counter-top. Secure the airgap using wrench and a provided nut. This air-gap hole is on average on the correct side of the sink, but nevertheless, it may be around the left, with regards to the producer of the sink. The airgap it self should be noticeable from listed below the counter. Add the most truly effective piece of the airgap as specified from the manual of the person manufacturer’s. Each air-gap manufacturer features a different attachment procedure.

Curl the drain hose from your dishwasher upward close to best and the again of the opening. Attach the hose to the airgap straight piping having screw-driver and a hose clamp.

Locate the drain pipe that is straight on the underside of the drain over the trap of the sink. Remove the drainpipe in the trap having a wrench. Attach a “Y” fitting involving the sink’s drain as well as the trap. Secure the fitting having a wrench.

Connect still another drain hose involving the angled pipe on-the-air gap to the “Y” fitting’s open pipe conclusion over the destroy pipe trap. Secure both ends of the drain hose with hose clamps utilizing a screwdriver.

Remove the hot-water valve in the hot water-supply line situated on the backwall of the cabinetry using a wrench. Hand flip a twin outlet shutoff valve onto the warm water supplyline. Tighten using a wrench.

Wrap plumber’s tape around equally threads of the twin outlet shutoff valve. Hand tighten the waterline of the sink faucet to the supplyline to another outlet of the dishwasher as well as one outlet. Tighten both connections using a wrench. It doesn’t issue which outlet materials which supplyline.

Wrap plumber’s tape across the male thread inlet link of the dishwasher stage. Hand tighten the end-of the warm water supplyline to this thread that is male. Tighten using a wrench.

Locate the two wires extending in the trunk of the opening. These wires should be common inside the new development of the home’s. Pull the wires toward the dishwasher, however don’t over stretch them.

Twist the wire that is white in the wall to the white wire of the dishwasher. Secure the experience of a twist- . Do the sam-e together with the wires.

Turn the water on in the principal valve.

Inspect all water connections across water-supply lines and the dishwasher to confirm that no leaks are happening.

Turn the circuit-breaker again on in the primary panel. Turn on the dishwasher. Allow it to to perform for a complete cycle to confirm performance.

Push the dishwasher to the opening. Ensure that hoses and no wiring are pinched throughout the installation method.

Raise and reduce the dishwasher together with the toes that are adjustable, utilizing pliers, to get plumb and the dishwasher level with the opening.

Attach the dishwasher to underneath of the counter with a screwdriver plus screws.

Reattach the face-plate.

See related

The best way to Tile a Shower Recess

An appealing tiled shower plays a role in the general benefit of of a house to prospective purchasers or renters and can improve the look of your bathroom. Minor functions in a shower, including a shower recess, niche, nook or cubby provide conveniences that are appealing. Tiling methods and proper planning will ensure a shower recess features as intended and is of interest. Perform that is good contains stopping the leaking of water to the wall, thus preventing the the development of mould,.

Determine the area when it is not existent, and prepare the wall. Place the recess between wall studs. In the event the wall is currently tiled, use a cut saw to make an angled cut via the tile chip off the tile parts using a chisel and hammer before slicing a gap through any backerboard or mesh. Always use safety glasses when cutting or breaking tiles up.

Build the body in the wall to to allow for the recess. Measure and cut 2-by-4s to fit snugly the present horizontally Pound the 2 by-4 sections to the opening; secure them if they don’t fit tightly. To generate a recess more narrow in relation to the stud bay, reduce and install 2 by-4s to new for that are partitions your recess. type to match vertically and

Cement backerboard in the recess. Cut and measure parts of of board to to match top and the sides and bottom of the market. Cut backerboard throughout the mesh layer on one side snapping it by scoring it. Place the piece for the back-wall first, then follow together with the sidewalls. Secure the backerboard and, if extra protection is preferred, dab a tiny bit of of thin-set mortar on the rear of every board section.

Adhere water proofing membrane to the recess. Cut an area of of membrane huge enough to to increase onto the around wall and glue it in the niche utilizing an adhesive or thin-set mortar meant for use together with the certain membrane materials. Work outwards, beginning in the guts of the backwall.

Cut and plan bull nose alternative tiles or cap across the recess for trim. When positioning the tiles that are lipped, t-AKE under consideration the thickness of the tiles that’ll be placed on the the inside partitions. Cut bull-nose cap tiles asneeded to to support the layout.

Tile the trim. Spread a a skinny layer of thin-set mortar throughout the recess and press the bull-nose cap tiles in to spot. Place tile spacers between tiles to preserve uniformity and look for for evenness using a level. Prior to the mortar starts to harden make corrections asneeded.

Tiles for the recess partitions. The tiles on the backwall needs to be oriented to align with all the around wall tiles. Determine cut tiles and your lay-out as required to accommodate the design that is required.

Spread a a skinny layer of mortar within the back-wall of the recess utilizing a trowel.

Press tiles to the mortar on the back-wall. Use spacers to preserve spacing between tiles and use a little or level piece of 2by-4to look for for evenness.

Tile the medial side partitions and “ceiling” of the recess utilizing the sam-e methods you employed with all the trim tiles and back-wall.

Tile or location a shelf piece. The bottom of the recess should slope somewhat toward the shower drain to facilitate drainage. Build a mortar layer up on the underside of the recess such that it’s slightly thicker in the rear. Run a straight-edged item on the mortar to test for and appropriate any large or reduced places. Create furrows to the mortar in the mortar having a trowel and press tiles utilizing spacers between tiles. Check the tiles to ensure that no tiles on the bottom have a lip and they’ve a minor slope. Allow the mortar to remedy per the guidelines of the manufacturer’s.

Spread grout to fill out the areas between tiles. This is simplest to do when the remaining tiled or shower region has been grouted. Pack and spread the grout in using a rubber-bottomed grout clear and float residue that was grout off the tile surfaces having a well- rinsed sponge. Allow the grout to established, again after the instructions of the manufacturer’s.

A grout sealer to the grout. This hinders mildew development, increases sturdiness and assists to pro Tect the grout look.

See related

The best way to Create a Counter

To get a hobby area, a work-top bench or anyplace in your house or garage, it is possible to construct a butcher block counter that is almost indestructible utilizing two-by- . Placing the alongside provides durability, power and moisture resistance that comes when the aspect grain is facing up to the counter. Side grain provides elegance and thickness. Build an old style butcher-block counter and set it up on top of any cupboard to get a counter that will not warp or crack.

Run all the studs down to TO AT LEAST ONE 1/4 inch thick. Use a sander, a planer, or have they are operate by a cabinet store for you personally. This is to eliminate the edges to ensure no gaps are laminated flat, with by them.

Lay the studs flat across two saw-horses. Mix the resin glue with water in line with the directions of the manufacturer’s. Pour the glue.

Run a large bead of glue down the facial skin of all the the studs. So the side of every board is facing the side of the board stand them up on their sides.

Place bar clamps across the studs spaced one foot apart and tighten them somewhat. Using the bar clamps as handles, so the bar clamps are to the underside, flip the stack over. Place bar clamps on leading, involving the bar clamps on the underside. Tighten each of the clamps as difficult as you can with your fingers. Wait 24 hours for the glue to dry.

Remove the clamps. Scrape off all residual glue using a glue scraper. Sand one area having a belt sander -grit belt until easy. Use an orbital sander with 100-grit paper to round each of the edges and sleek the best to eliminate any scratches left over in the belt sander.

Place the two-by-four counter along with a suitable cupboard. Open any doorways or eliminate drawers. Lean to the cabinet using a drill. Using A3/16-inch bit, drill up through along side it jambs, the again rail of the cupboard as well as the again of the faceframe, 1inch down from the most effective edge a-T A – 30-diploma angle so your drill bit penetrates out through the most notable edge of the jambs, top-rail and face-frame. Space the holes 4″ aside. This is known as “toenailing.”

Place 2 inch screws in the holes. Using the gun that is cordless, screw the counter tight to the very top of the cupboard.

Pour A3-inch circle of linseed-oil out along with the counter. Using a delicate fabric, wipe on the oil the the top of counter. Wipe equally sides and the face to get a straight, moist coat of oil. Let it soak in for one hour and wipe off it. Apply oil six months guarded.

See related

The best way to Clean a Bathroom Vent Fan

A great bathroom vent efficiently eliminates odors and dampness from this active area but homeowners tend to forget about cleaning it, since the lover has gone out of immediate sight. Allergens that are grimy can gather even recirculating germs and diminishing the lover usefulness. You need to blow the bathroom vent with air out when dirt is seen. Eliminate the vent to get a deeper cleansing, accessing the fan blades in the unit.

Flip the circuit-breaker controlling the bathroom fan. By flipping the switch test the lover. Fill a sink with enough water to protect the vent. Add several drops of dish washing soap to the water that is running. Wet a cloth in the water.

Position a step-ladder put and below the bathroom exhaust on a pair of safety goggles to keep particles from the eyes.

Climb the ladder and unscrew the vent fan in the ceiling. There’ll be two to four screws holding the vent set up. Use a Phillips screwdriver to remove the screws. Save the screws by putting them someplace secure or tucking them in to your pocket.

Climb the ladder down and spot the cover. Push the protect to the water, completely immersing it. Go back-up the ladder and wipe the fan blades using the cloth. Remove any grime that is obvious in the blades however don’t damp any wires. In case you see wires or can not without touching the wires achieve the blades, discontinue your cleansing. Call an electrician to have the wires.

Pat the cleaned blades dry using a soft fabric.

Clean the cover, wiping away any particles, dry it using a cloth and rinse it in water. Allow the fan before re-attaching the cover to dry.

Replace the cover by screwing it down and pushing it back back to place. Push the vents open.

Flip the circuit-breaker to the “on” position and start the fan.

See related

The best way to Wire an Outlet

Painting your walls a different colour can renew your house, or make it more more inviting to your potential buyer. Completing the wall colour transformation needs eliminating outlet addresses and even when they’re outdated, worn, stained and clash with all the wall colour, changing the shops. When installing a new outlet, particularly an outlet with six wires at the center of the circuit failing to produce a record of the way the wires connected to the first outlet can cause some confusion. As soon as you determine the outlet terminals as well as the wires, it is possible to wire virtually any outlet in your home.

Check the circuit-breakers in the breaker panel and ensure the breaker for the outlet is nevertheless in the “Off” place.

Hold a non-contact electrical tester close to the wires in the outlet box. If electricity is present in the outlet box the tester will sound an alarm and start an indicator light.

Look in the outlet box to determine the six wires. There are two wires, one that offers electricity to another that connects the outlet to a different outlet across the circuit and the outlet. There are two white wires that connect with still another outlet and to the outlet in the primary source. The two bare copper ground wires help avoid accidental electrical shock. While the other connects the outlet just, one floor connects to the outlet in the primary power supply.

Turn within the outlet to determine the terminals located on each individual side. One side and the other has copper-colored final screws or two black and two coloured terminal screws, respectively. One established of black or copper and silver-colored terminals could be called “Line” as well as the other defined as “Load.” The bottom of the outlet features a solitary green final screw called “Ground.” If the sets of terminals aren’t labeled, you don’t need certainly to worry about which particular side of the outlet you attach the wires.

Bend the ends of the wires in to tiny hooks with needle-nose pliers. The hooks to match the final screws on the outlet round.

Hook the black wire coming in the key breaker panel across the black or copper “Line” final. Use the terminal that is best on an outlet that is unmarked. Tighten the terminal screw to contain the the wire. Hook the remaining black wire round the black or copper “Load” terminal or the bottom terminal on an unmarked outlet. Tighten the terminal.

Wrap the white wire connecting from your principal breaker panel across the silver-colored “Line” final. Use the final that is best on the outlet on an outlet that is unmarked. Wrap the remaining white wire round the silver “Load” final or the bottom silver terminal when the outlet isn’t marked. Tighten both silver-colored final screws.

Hook the two bare copper floor wires round the ground terminal on the base of the outlet. Tighten this screw to finish the outlet wiring.

Install the outlet to the outlet box. Connect the outlet to the box together with the screws that was included with the outlet at both bottom and the top. Cover the outlet using a wall-plate and connect it using the screw that included the plate.

Flip the circuit-breaker to the “On” place in the breaker panel. Plug radio or a little equipment to the outlet. Turn on radio or the appliance to assure the outlet works.

See related

The best way to Clean the Pilot

When the pilot in your wall furnace doesn’t remain lit, your furnace won’t warmth. The wall furnace can be caused by a number of factors to not mild, including a fuel offer that is disconnected, a pilot orifice as well as a broken thermocouple. The pilot features a tiny opening in its conclusion that will become clogged with particles and dirt and dirty. Cleaning the pilot in your wall furnace save you and can get your furnace heating.

Shut off the electricity to the furnace at your primary breaker panel. The single-pole breaker operates the blower motor as part of your fuel furnace. Turn the wall furnace.

Turn off the fuel to your own wall furnace. The supply line has a cut-off valve to stop the fuel flow to the furnace and is close to the furnace. Rotate the valve handle to the “Off” place. Use a gas-meter important to turn off the fuel supply to your own house in the exterior meter in the event that you are unable to locate the cut-off valve.

Open the access panel to make it to the pilot as well as the fuel control valve. The entry panel is held shut by two or one screws and is positioned in the underside of the furnace.

Look on the fuel control valve for the fuel control knob. Push in on the knob and turn the control knob to the “Off” place.

Follow the fuel line in the control valve to to find the conclusion of the pilot. Wipe the end of the pilot with the emery cloth. While you’ve accessibility wipe the conclusion of the thermocouple alongside the pilot.

Unbend a paper clip to straighten it. Insert the conclusion of the paper-clip in to the opening at the conclusion of the pilot to eliminate any ash or particles which may clog it.

Turn the principal fuel provide again on to your own wall furnace. Turn on the wall furnace circuit-breaker.

Push in the gasoline get a grip on knob and rotate it to the “Pilot” place. Keep keeping the knob down while lighting the pilot having a fire-place match or by pressing the igniter button before the pilot lights. Slowly re-lease the fuel get a grip on knob.

Rotate the gas handle knob in your furnace to the “On” placement. Close your access panel and established the thermostat in your furnace to your own desired temperature.

See related

Copyright h o m e s t a y b e i j i n g 2 0 0 8 2024